Make Your Own Fanny Pack
Today we’re going to work through a fanny pack tutorial to create a fanny pack that is:
- Funky
- Zipper free
- Great as a gift or
- Great for you!
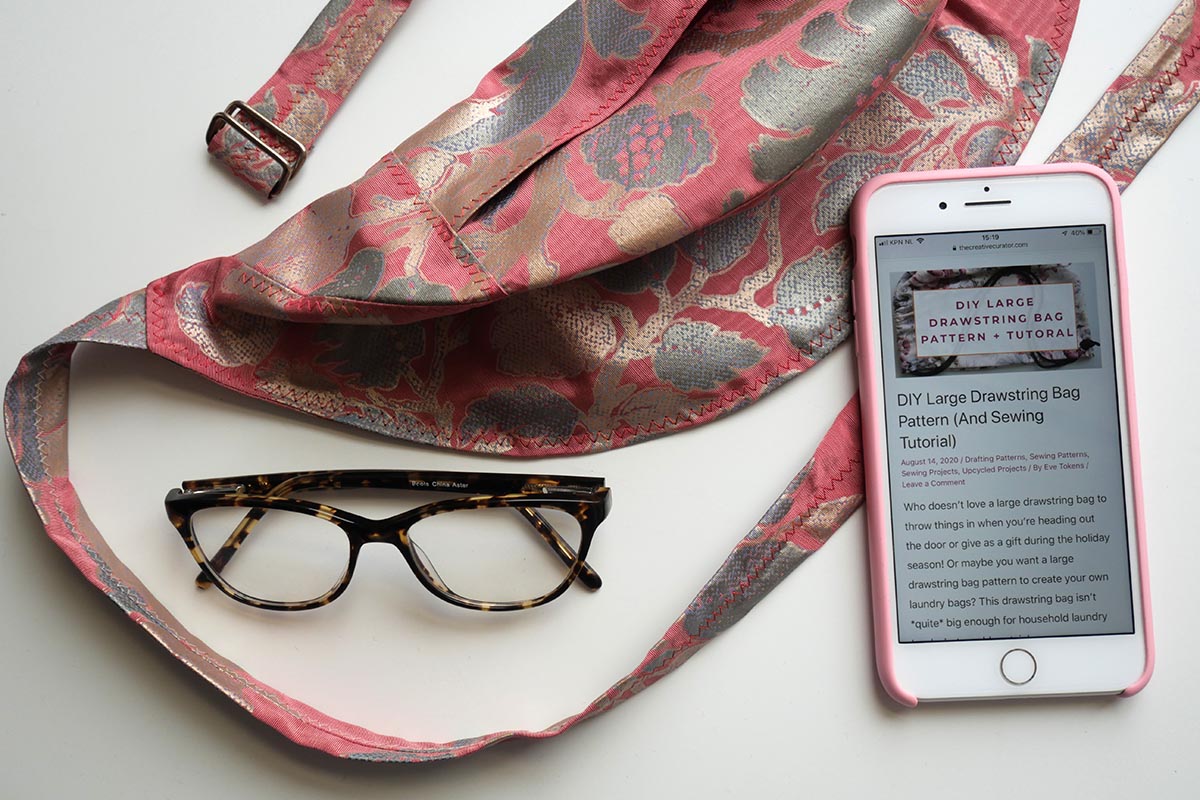
To follow this fanny pack tutorial, you’ll want to grab a copy of my fanny pack sewing pattern from my shop. It’s a digital sewing pattern that you can print at home.
You can work your way through this fanny pack tutorial, or skip to the bottom for the video tutorial!
Preparing The Fanny Pack Pattern
Start by printing off the pattern and checking that the scale is correct!

Next, continue sticking the pages together and either tracing off or cutting the pattern pieces you need. I prefer to cut the paper across the bottom and up the right hand side of the page.


For this simplified version, you’ll want pattern pieces:
- 3, 6 and 11 for the front
- 16 for the back
- 12, 13, 14 and 15 for the ‘top’
- 17 and 18 for the straps (crosscheck that the straps are not too long or too short for you before cutting. You can always extend or shorten if need be)
Final step – because this is the ‘simplified’ version without the front pockets of water bottle holder – pin together pattern pieces 3, 6 and 11 to form just one piece. I have the stitch lines marked on every piece, so you can just overlay these to eliminate the seam allowance.


Fabric For Your Fanny Pack
For this fanny pack tutorial I decided to use a remnant of upholstery fabric that I love. Some of you may know that a neighbour of my parents (Chris) keeps me well supplied with leftover upholstery fabric, which she acquires from her daughter Gill. Not sure where Gill gets it from, but as Chris has a well stashed sewing room of her own, she passes on to me fabrics that she has no use for. #winning

These fabrics are usually intended for cushions, curtains and what not, but I like to use them how I see fit. Which often means being made into tops, skirts dresses and now a fanny pack!
You of course can use any fabric you like, though I would highly recommend going with a fabric that has some structure to it. While I’m down with sheer, lightweight fabrics, I’m not sure a fanny pack made from organza is going to be very functional! 😉

Here are some fabrics I’ve used to make a fanny pack:
- Denim
- Drill
- Sheepskin
- Leather
- Suede (I have a fanny pack tutorial for a fringed version going live soon!)
- Sequins
- Medium weigh cotton
The options are endless, which is why this fanny pack pattern is such a great one for anyone that wants to make great gifts!
Once you’re decided on you fabric, cut the pieces out so you’re ready to rock!

Additional Supplies
You’ll also need a button, a small piece of self fabric to make a rouleau style loop and two D or 0-rings.
You may also want to add interfacing to the straps to add more strength – though I have never done this and my fanny packs have all be fine without!
Sewing The Fanny Pack Pattern
Now we move onto the fun part – sewing!
Step 1: Finishing Fabric Edges
Start by finishing all your fabric edges, being careful not to stretch out any of the pieces. You can use an overlocker / serger if you have one, or zigzag stitch using your standard sewing machine.
If you’re an intermediate sewer and happy to do so, feel free to skip this step and overlock / serge you sections together as you move through the fanny pack tutorial.
If you’re an advanced sewer, you could also create a lining pattern and bag out the fanny pack as well!
Step 2: Creating The ‘Top’ Of The Fanny Pack
As the pattern is zipper-free, I like to start by creating the top section which comes in four parts.


Start by pressing, pinning and then stitching the seam allowance on sections 12 and 13. (I used a zigzag stitch because I forgot to finish my edges before sewing! 😮)
Then, using your pattern pieces for guidance, lap section 12 on top of section 13, and stitch in place on the shorter edges to secure. This will be the fanny pack opening.


Place sections 14 and 15 right sides down, pin at the notches and then sew with a 1 cm seam allowance. Finish with a line of top stitching 0.5 cm from the right side. Press to set all seams.


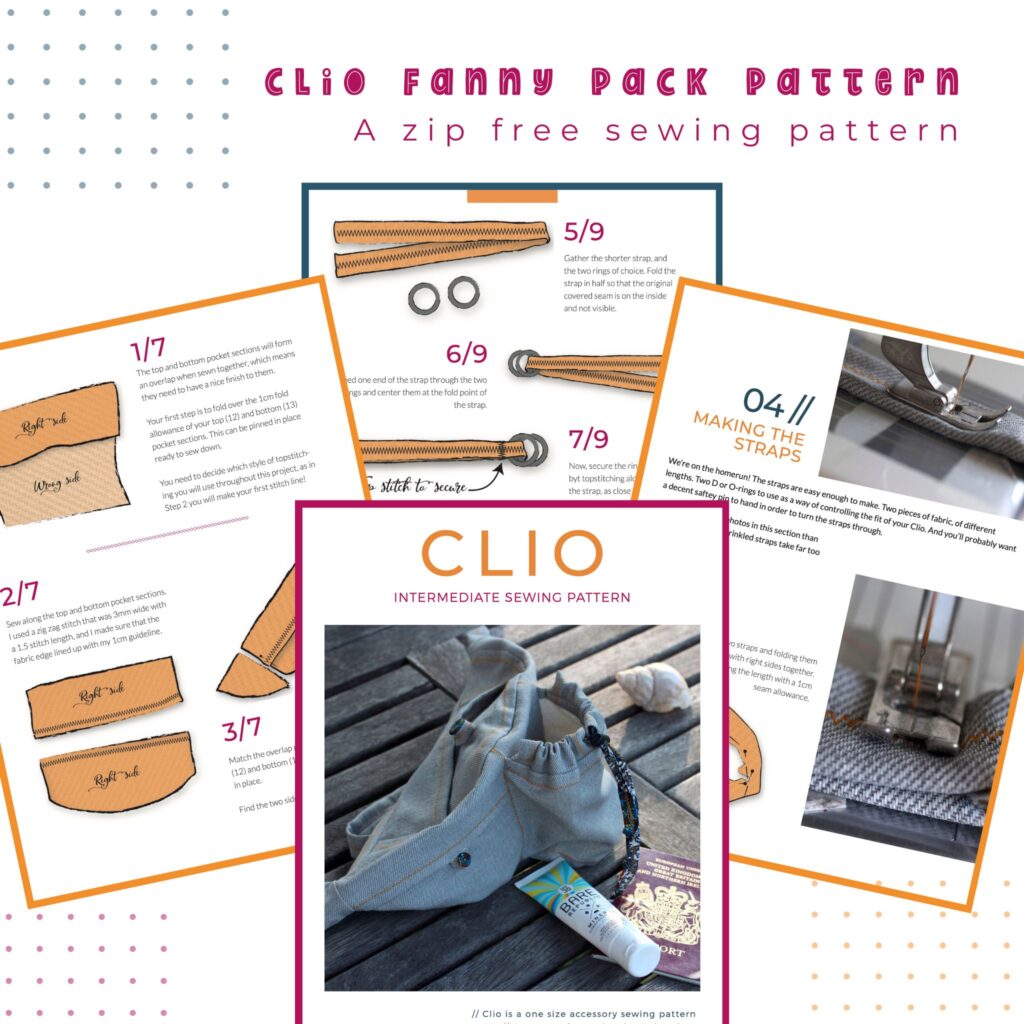
Step 3: Sewing The Straps
Next up, we sew the straps.

On the pattern pieces, you’ll see that there are two dashed lines – these are the fold lines. Mark them with snips at each ‘short end’ because we’ll want these notches later on, then remove the pattern pieces and fold in half lengthways.

Sew along the long edge on both pieces, maintaining the 1 cm seam allowance! <– This is super important because the ‘gap’ that the straps are inserted into is a tight fit!

Press the seam you made, and then turn through so the the right side of the fabric is now showing. (I use a safety pin for this process!) Fold the strap at the notches so that the seam is at the back. Turn in one short edge on each strap piece and sew in place.


Finally, topstitch along the length of the straps however you feel looks best with your fabric choice.

You should now have a completed top and two straps!

Step 4: Attaching The Top To The Back
This is where things get a little bit tricky, so do take your time.
Make sure you have snipped in your notches at the top of section 16. These are the points where the very thinnest parts of sections 14 and 15 will line up!
Place the completed ‘top section’ from step 2 on top of section 16, keeping right sides together and pin in place.

Sew with 1 cm seam allowance, being careful to only sew between the notches. (This is the reverse to highlight the notches!)

Press the seam and then add any desired topstitching – it is much harder to topstitch this section later (as you can see in the video tutorial!) so I do advise you to do this now, but maintain the topstitching within the notches!

Step 5: Attaching The Front To The Top
Grab the front section of your fanny pack pattern, and place it right side down on top of the ‘top section’. Line up carefully to ensure that the short sections of the long edge line up with the ’empty’ areas of the back section!

Pin in place to secure, and then sew with a 1 cm seam allowance, connecting the front section to both the back and top pieces. Your fanny pack should still be open however – you have just ‘closed off’ the top of the back section.


Once the two shorter sections are sewn, manoeuvre the fabric aside at both pivot points and sew the middle section closed.

Step 6: Connecting The Straps And Closing The Fanny Pack
The last step in closing the fanny pack is to connect the straps at either end and then close the back in one line of stitching!
Place the straps wrong side down on the back section. I recommend double checking that the ‘front’ of your strap is facing upwards and that when turned through will be facing outwards!

Pin in place as shown below, and then bring the front of your fanny pack over covering the straps and the back.

Pin the lower edges of the front and back sections together, being super careful not to catch any part of the straps in what will be a seam!

Sew from the strap edge down, and around the bottom and then back up, with a 1 cm seam allowance, and minding the pins that we left in to secure the straps in place.


Turn through the fanny pack using the opening in the top, remove the pins from the strap sections and press carefully. I like to reinforce the joins where the straps are connected to the body with a line of zig zag stitching from the right side.

Step 7: The Closures!
Finally we add the closures!
Adding The Button and Loop
Create a small loop with a scrap of self fabric, and secure to the lower edge of section 12 at the top of your fanny pack. Make sure the loop is big enough to fit your chosen button through! I usually just hand sew the loop in place, but if you need yours to be more secure do use your sewing machine! Hand sew the button in place on section 13.
Adding The O- or D-Rings
Grab your two O or D-rings and place them at the end of the shorter strap.
Fold under some of the strap, and topstitch in place to secure the rings. I’ve used a zigzag stitch to maintain design consistency.


Video Tutorial of Sewing the Fanny Pack
The Final Funky Fanny Pack!
There you have it! A simple fanny pack tutorial! I love fanny packs, whether this funky version, my fringed suede version or the original denim one I use with my water bottle when cycling! They have so many uses and the blingy versions are definitely great for festivals, going out for dinner or just an accessory that jazzes up an outfit.
Don’t forget to buy my fanny pack sewing pattern here!
How do you feel about fanny packs? Will you be giving this tutorial a go?


Very helpful for me. Thanku for that
Yay, happy to hear that Hafsa!