
The Double Welt: A Jet Pocket Tutorial
Another tutorial in my pocket tutorial series, this jet pocket tutorial will guide you through the process of creating one of my favorite pocket types!
Also commonly referred to as a double welt pocket, the jetted pocket is an inset pocket where both edges of the pocket opening are bound.
Similar to the way bound buttonholes are created, jetted (or double welt) pockets have two narrow lips, which are very rarely greater than ½” / 1.25cm in width per jet. This is why it is often referred to as a ‘double welt pocket’.
If you do prefer to watch a video, I created an in-depth video tutorial on how to sew a double welt pocket which you can watch on my YouTube channel.
Let’s dive in!

What You’ll Need
To sew a jet pocket, you’re going to need the following:
- Pocket pieces
- Tailors chalk
- Interfacing
- Measuring gauge
- Hand sewing needle
- Thread
- Pins
- Small sharp scissors
How To Sew A Jet Pocket
This is the method that I learned during my tailoring module at fashion school – it has worked for me time and time again, so I have no doubt that if you follow the steps you will also be sewing your own beautiful jet pockets in no time!
Step 1: Marking The Jet Pocket placement

Start by marking in the location of where your jet pocket will be. In the above photo you can see that I have used my tailors chalk to roughly mark in the location of my pocket.
Step 2: Interfacing For Stability Of Fabric

Step two is to use interfacing on the main fabric and the two jet pocket pieces to stabilise them. Once done, line both pieces up with your original marked line.
If you’re uncertain on this step, please do watch the video at the bottom of this tutorial for more detail.
Step 3: Sewing The Jet Pocket Sections
Start by securing the jet pocket pieces into place using pins. You can also hand baste if you prefer. I have also marked in the start and stop point for my stitch line with a fabric marking pen.

Sew both jet pocket pieces to the main garment fabric using a small seam allowance. I used 0.6cm for mine.
Again there is proper close up video footage of this step in the accompanying video tutorial.
Step 4: Hand Sewing The Pocket ‘Ditch’
Now that the main stitched lines are complete, you need to cut through the main fabric so that you can push the pocket pieces through to the back, and create the jets.
This process is very clearly shown in the accompanying video tutorial – be mindful of cutting to the corners so that both jets lay nicely.
Use your fingers to manipulate the fabric around the seam allowances that were created. Pin each jet as shown in the photo below.

Load up a hand sewing needle with matching thread – mine is slightly off so that you can better see what I am doing.
Sewing as neatly and inconspicuously as possible, secure the jets in place. You can see in the image below that there is no stitching visible from the right side when this is sewn correctly.
From the wrong side you can see the two methods that I used to hand sew the jet pocket lips into position. The shorter upper lip has no visible stitches. This is the correct method for hand sewing your jets into place.
The lower pocket piece has very visible stitching. This is not how your hand stitching should look, as it leaves thpocket at gris of coming undone.If you stitching looks like this, unpick it and start again.

Step 5: Securing The Triangles
You may be wondering what I mean by triangles! These are the little wedges we created when we cut into the fashion fabric to make the jet pocket.
You need to carefully sew over these to secure the jets into position and stop them from shifting at the shorted sides. You’ll want to sew as close to the fold as possible without sewing the fold, otherwise it will be visible on the right side of your jetted pocket.

The photo below shows how your jetted pocket should look on the shorter edges when this triangle is stitched to secure it.

Step 6: Attaching The Pocket Bag Piece
If you’ve opted to create your pocket bag from a lighter weight fabric (recommended when your main fabric is a medium to heavy-weight to prevent it being too bulky) then it’s now time to attach this piece.
It goes without saying that your fabric pieces should have the raw edges finished to prevent fraying – and overlocker or serger is good for this but you can also zigzag stitch – but you can also leave this step until later if your chosen fabric is less prone to fraying when cut.
Place the fabric over the existing piece, and align all edges, particularly the upper edge and the sides. The lower edge (towards the garment hem) can be trimmed afterwards.

Sew around the entire perimeter so that the pocket bag of your jetted pocket is now completely closed. At this point you will also want to finish the raw edges if you haven’t done so already. This can be on using a serger / overlocker, a zigzag stitch on a sewing machine or by binding the edges with bias tape.
Use the most appropriate method for the garment you are sewing.
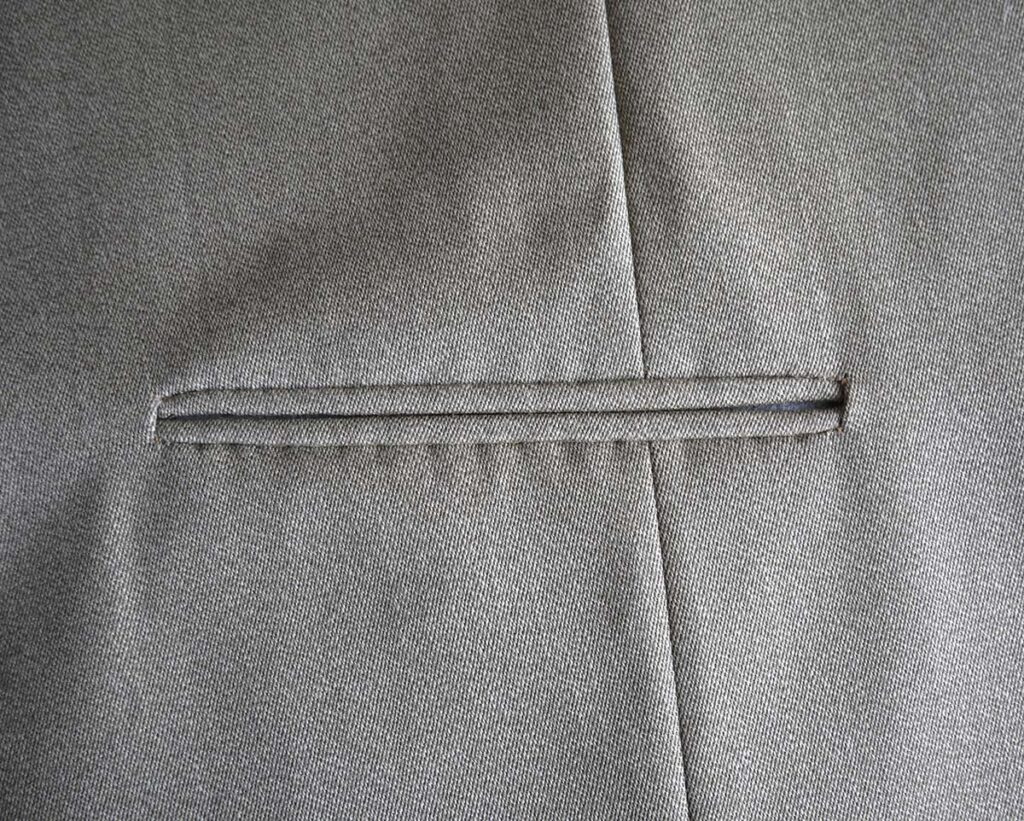
The Final Jetted Pocket
I find the jetted / double welt pocket to be more fiddly to create than the traditional welt pocket, but it is still lovely type of pocket that everyone should try sewing at least once.

Below is a side by side of the same pocket type in a heavier fabric as a sample.

If you’d like to sew a welt with just the one piece, I have a welt pocket tutorial for you too and then I’ve recently added an accordion pocket tutorial and a side seam pocket tutorial with free pattern too.
Have you made a jetted pocket before? Did you struggle with it or find it easy enough? Will you be making more of these types of pockets or trying something new? Let me know in the comments below!


