Slash And Spread Method For Manipulating Darts
The slash and spread method is a technique used to manipulate darts on patterns – usually around the bodice but it can also be used on other pattern pieces that have darting.
Slashing and spreading darts is a simplified version of the second method of dart manipulation: pivoting. When learning pattern making techniques, slash and spread is a great starting point for beginners, as there is less possibility for errors – though it is important to note that once you have ‘slashed’ the pattern piece, it is not reversible.
For this reason, you will want to create a copy of any pattern piece you plan to modify before manipulating the darts using this technique.
In this dart manipulation tutorial we will be transferring one waist dart on the bodice into another position – the armhole. In upcoming tutorials, I will teach more varied techniques, from individual dart position tutorials like the French dart, through to quite advanced dart manipulation techniques.
Some of the links in this article are affiliate links. This means that I may receive a fee at no extra cost to you if you purchase a recommended product.
Tools You’ll Need To Slash And Spread
Here is a basic list of eleven tools that you will need to be able to use this dart manipulation method:
- Pattern making paper
- Hard pencil
- Coloured pencils
- Pattern master or fashion ruler
- Paper scissors
- Tape measure
- Masking tape (the non-tacky option)
- Glue stick
- Pins
- Tracing wheel
- Awl
- Cutting mat
Step 1: Create The First Copy

Trace the original pattern piece onto a new piece of pattern making paper, carefully noting all the original marks and notches, along what would be the stitch line – you are not including the seam allowance!

Use the pencil and the pattern master to maintain accurate straight and curved lines on the pattern.

Step 2: Choosing The New Dart Location
Now you’ll want to evaluate the traced pattern piece and decide where to move the old dart to.
In this example we are only moving the dart to a new position – the centre front neckline – but for future experiments, you could also consider whether the dart will be:
- Split to create multiple darts in new positions
- Incorporated into a style-line
- Used as another form of fabric suppression in a new position
It is important to note that on bodice blocks, darts that will be sewn do not extend all the way to the bust point as this would give a very ‘pointy Madonna-bra- look to women’s clothes – and we don’t want that right? 😉
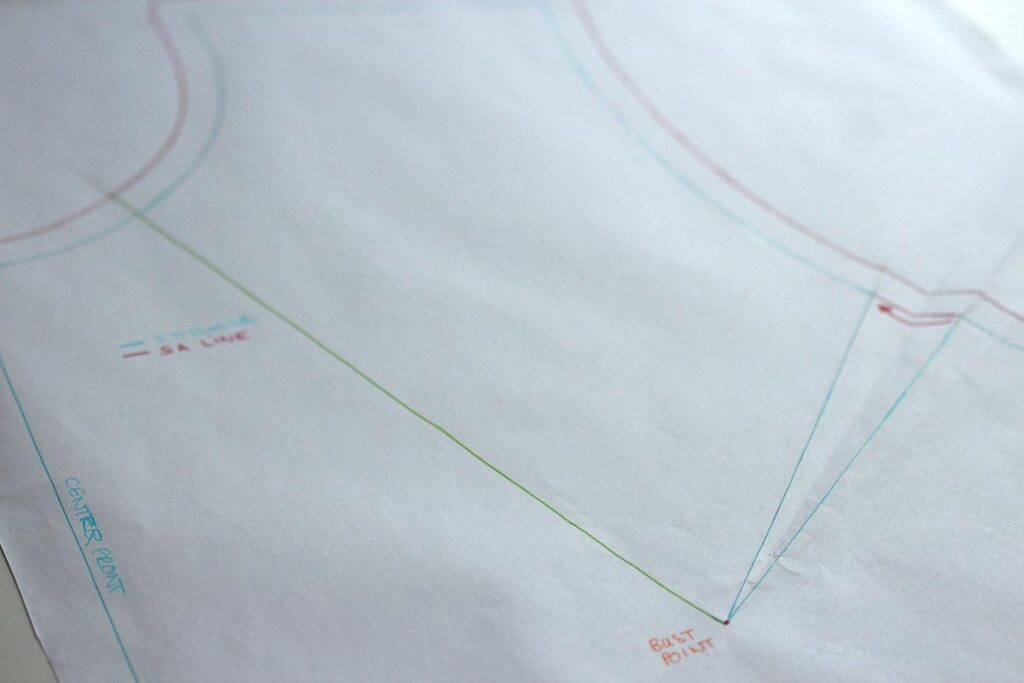
So, in this example I will mark a point for the bust point approximately 2.5 cm / 1 inch in from the dart point. This is an average, but you can also hold the pattern piece against yourself to see where your bust point naturally sits, and then mark this on the pattern.
Now that we have a bust point and have decided where to move the original dart to, we need to mark in this ‘new position’ on our traced pattern piece, making sure that the line intercepts the new dart point of the original dart.

I use a coloured pen so that it stands out a little more clearly.
Step 3: Closing The Original Dart
We’re now going to close the original dart.
Typically this would be done by ‘cutting to, but not through’ along one of the original dart legs.
You’ve possibly heard that before in terms of sewing and snipping in your notches, but this is now your mantra when using the slash and spread method of dart manipulation!
Take your paper scissors, and as accurately as possible, cut from the opening of one dart leg up to the dart point, stopping just a millimetre or two away.
If cutting into your sewing pattern makes you nervous, you can also ‘fold and glue’ the dart into position. Start by creating a folded edge along one edge of the dart.

And then fold that edge over until it lines up with the second dart leg.


Ease the paper carefully so that the top folded line (dart leg) lays neatly on top of the bottom dart leg.

The piece of pattern paper will now be raise from your work surface, because the dart has suppressed an area of the paper and needs to be released somewhere else to make the paper lie flat.
You can either use a glue stick or tape to hold the old dart in position, or release it and allow it to lie flat whilst preparing the new dart area.


Step 4: Transferring The Fabric Suppression
Rotate the pattern piece around so that the line you marked in (for the new position) is nearest to you, and use your paper scissors to cut to but not through the dart point. You should now have a hinged dart!

When you have cut along the new dart line to the bust point, you will be able to close the old dart more easily.


You can see that now I have cut and opened my new dart, I have used masking tape to close the original dart location. You can use masking tape, glue stick or scotch tape – just make sure it is secured!
Step 5: Marking The New Dart
Take a little extra pattern making paper, and place it beneath the pattern piece where the new dart position will be. Tape the pattern piece to the spare paper to secure it in place, using a non-sticky tape.
Now that you have moved the dart from one place to another on your pattern piece, your next step is to secure it in place.
I prefer to use a glue stick to keep it in position, but as a pattern making newbie, you may prefer to tape it down as you can then remove the tape and change the dart if needed.
Next we need to move the dart point away from the actual bust point – so I’ll mark in the 2.5 cm / 1 inch amount we used before and then connect each of the dart legs to this point.
Step 6: Adding Seam Allowance
Now we’re ready to add the seam allowance back on to our pattern piece. I use a 1cm seam allowance, and have added this to my bodice pattern using my pattern master. You could also use a graders ruled for this if you do not have a pattern master.
Make sure that you are only adding seam allowance to the areas needing it – in this case, not the centre front bodice as it will be cut on the fold. If you’ve never added seam allowance before this tutorial shows you how to add seam allowance to sewing patterns.
Step 7: Truing The New Dart
Before we finish up, we need to true the dart. This is the process of making sure that the dart legs are aligned in length.
To do this, note which direction the dart excess will be folded towards. For this new neckline dart, I will be folding the excess in towards the centre front.
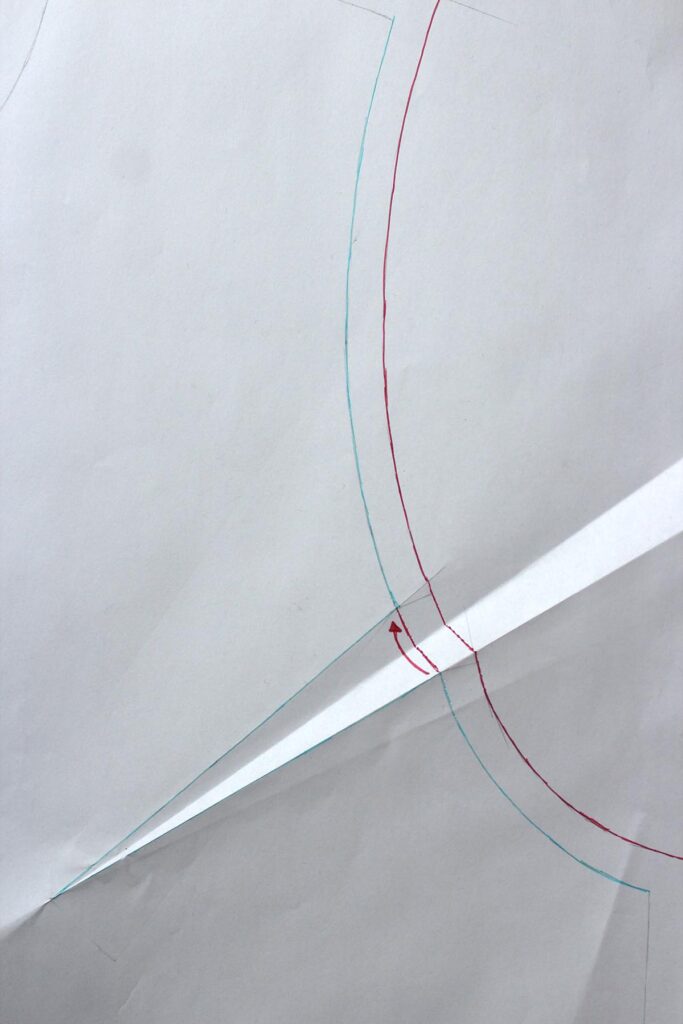
Fold along the lower dart leg, and then bring the folded edge up to meet the top dart leg. Make sure the dart point is nice and crisp and press the fold created on the underside, which is the centre of the dart excess.
RELATED CONTENT:
Next, take your tracing wheel, and with a cutting mat beneath, mark along both the stitch line and the seam allowance line so that it is a smooth line with no visible ‘step’ created from the manipulation of the dart.

Create A Working Pattern Copy
Finally – and you could skip this if you wanted to, but I do not advise it – copy the new pattern piece you have created, along with all the markings and notches.
There you have it: seven steps of slash and spread dart manipulation.
You should now have:
- Your ‘master’ pattern piece – original pattern piece
- Your ‘development’ pattern piece – the pattern you cut and slashed
- Your ‘working’ pattern piece – the new copy you have traced from the development pattern
Make sure that you have noted these versions on the pattern pieces – it will make it faster and easier for you to make changes using these at a later date!
Dart Manipulation – What’s Next?
The next tutorial in the dart manipulation series if on pivoting darts. It is essentially the same as this technique, but with no cutting of paper, and is used by those more comfortable with pattern making techniques.


