DIY Wrap Skirt: How To Make A Wrap Skirt With Ties
I love a DIY wrap skirt. They’re a comfy and adjustable type of skirt, allowing room to ‘breathe’ if you’ve ended up eating too much, and so easy to make too! If you have been wanting to learn how to make a wrap skirt with ties – I’ve got you covered!
My Ma gave me a very old dress that she had received from an old darts teammate named Vera. Vera was a big lady, so the dress had plenty of fabric to it, but it wasn’t something my Ma nor I would ever wear. It was a frumpy old-fashioned design.
I loved the fabric though, and promptly nabbed the dress from my Ma, thinking it would make a beautiful DIY wrap skirt.
Some of the links in this article are affiliate links. This means that I may receive a fee at no extra cost to you if you purchase a recommended product.

What Is A Wrap Skirt?
For those who don’t know, a wrap skirt is simply a skirt which wraps around the body, usually at the waistline and overlapping at the centre front to provide some modesty.
A wrap skirt with ties at the waist allows for more movement from the waistline down, while wrap skirts that have a partial closure using a zipper or buttons are often a little more fitted and can therefore restrict movement.
Who Invented The Wrap Skirt?
There is very little information on who invented the wrap skirt, though Diane Von Fürstenberg is credited with inventing the wrap dress in the early 1970s.
However, there was also the Italian designer Elsa Schiaparelli, known for her wrap dresses back in the 1930s. It is safe to say that these two female fashion designers influenced the wrap skirt.
How Do You Measure For A DIY Wrap Skirt?

The key measurements you need for this up cycled wraparound skirt are:
- Waist
- Hip
- Finished length
With just these three measurements, it is very easy to create this skirt!
What Fabrics Work For A DIY Wrap Skirt?
The fabric you choose for your DIY wrap skirt largely depends on the time of year that you think you’ll be wearing it.
For summer wrap skirts, you could use a lightweight cotton such as lawn, or even a nice linen.
If you planned to wear your DIY wrap skirt for evenings, you could sew one up in silky or sheer fabric types such a silk chiffon (with an underslip) or silk satin.
In the winter time, when it’s a tad chilly out, you could opt for a heavyweight wool wrap skirt, lined with silk and worn with tights and boots.

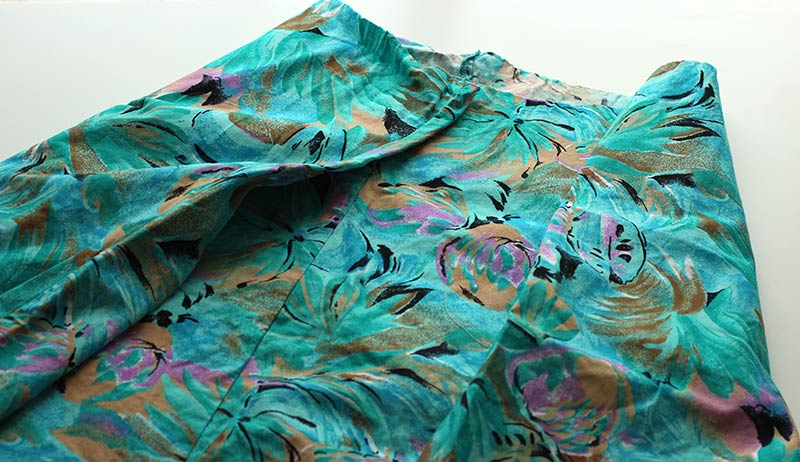
You could even do as I did, and find a much bigger, secondhand dress to deconstruct and upcycle into a wrap skirt with ties!
This is the dress that I chose to make my DIY skirt from. It had an elasticated waist.

The sleeves on the original dress weren’t really sleeves, more an extension of the fabric which allowed too much fabric to swamp around my armhole.

The original V neckline wasn’t really my style…

As well as the hem, the side seams on the dress had also been overlocked.

If you opt for upcycling an existing dress into a skirt, the fabric possibilities are endless!
How Do You Make A Wrap Skirt?
Are you ready to learn how to make a wrap skirt? These 7 steps will walk you through making your own wraparound skirt. Now, this skirt tutorial is based upon upcycling an existing dress into something more suitable for myself. You could also self-draft a wrap skirt using this draft a skirt block tutorial.
1. Know Your Measurements
We covered measurements briefly further up in the tutorial, but let’s cover them in more depth here.
Waist Measurement
You need your waist measurement to know how ‘wide’ you need your secondhand dress or skirt to be at the waistline. Take the measurement from the area of your waist that is likely to be the location of the finished skirt waistline.
Hip Measurement
This measurement is almost more important, as your hips are generally much larger than your waist. Knowing your hip size will help to choose a secondhand skirt or dress that has enough coverage for your hips and half again at least.
Finished Length
When I measure for my finished length, I place the top of my tape measure at my favourite waistline position and allow the tape measure to drop towards the floor. I then ‘walk’ down the tape measure until I reach the point – usually above my knee – that I want the wrap skirt to finish at.
This measurement is important because you will need to opt for a maxi length dress or skirt to upcycle if you are hoping to make a maxi wrap skirt.
2. Choosing Fabric
When choosing fabric for your DIY wrap skirt, think about the season you’ll be wearing it. I opted for upcycling Vera’s old cotton dress because it was heavy enough to see me through the autumn and possibly brighten up my winter days with a pair of tights and a wooly sweater.
If you’re sourcing a dress or skirt to upcycle from charity shops, have a look at the sizing rail that is two or three sizes bigger than you.

I would love for you to take a tape measure and check the fabric amount carefully, but the truth is you can easily guesstimate whether something will work.
I would hold the skirt or dress up against your body, so that the existing hem falls a couple of inches below your favourite finished length point.
Then, check that the upper section has enough fabric to wrap around your chosen waistline at least 1.75 times. This will allow for any possible cutting open of seams as well as the wrap skirt wrapover!
3. Deconstructing The Original Skirt Or Dress

Now that you have a dress or skirt to upcycle, you need to ‘secure’ the fabric for use.
I tried to unpick the bodice section from the skirt with a seam ripper, but as the waistline seam allowance had been overlocked, it was taking forever.

I ended up taking out the scissors and cutting things up.
- Cut away the top from the waistline
- Cut along what I thought was the centre back
You end up with what can be described as an odd shaped skirt opened up at just one original seam.
4. How Do You Hem The DIY Wrap Skirt?
Now that your fabric is flat and accessible from being separated, you will want to decide whether the hem is finished neatly enough. My original hem was a simple single fold and sloppily tacked down, so not good enough for more than a few wears.

I cut along this original hemline so that it left me with a raw edge.

Now, usually hemming is done at a later stage, but as this wrap skirt is open and will have bias binding on the sides, the hem was actually the first step for me.

I decided to have a double-turned hem, to add a little structure. As the original hemline was on a curve, this meant carefully pinning and easing the two turns of fabric so there would be no puckering or tucks when sewn in place.

The final step was to machine sew the hem in place, approximately 1.25 cm from the folded edge.
When you are sewing a hem on your skirt, really think about the hem that is most suitable for your chosen fabric.
5. Deciding The Finished Length
Now that the hem is done, you can lay the tape measure onto the skirt fabric and measure upwards towards the waistline the finished length amount.

I would add on a little seam allowance – it should equal the finished width of your bias binding which will enclose the raw edge.
Cut along the top of the skirt keeping the length consistent.
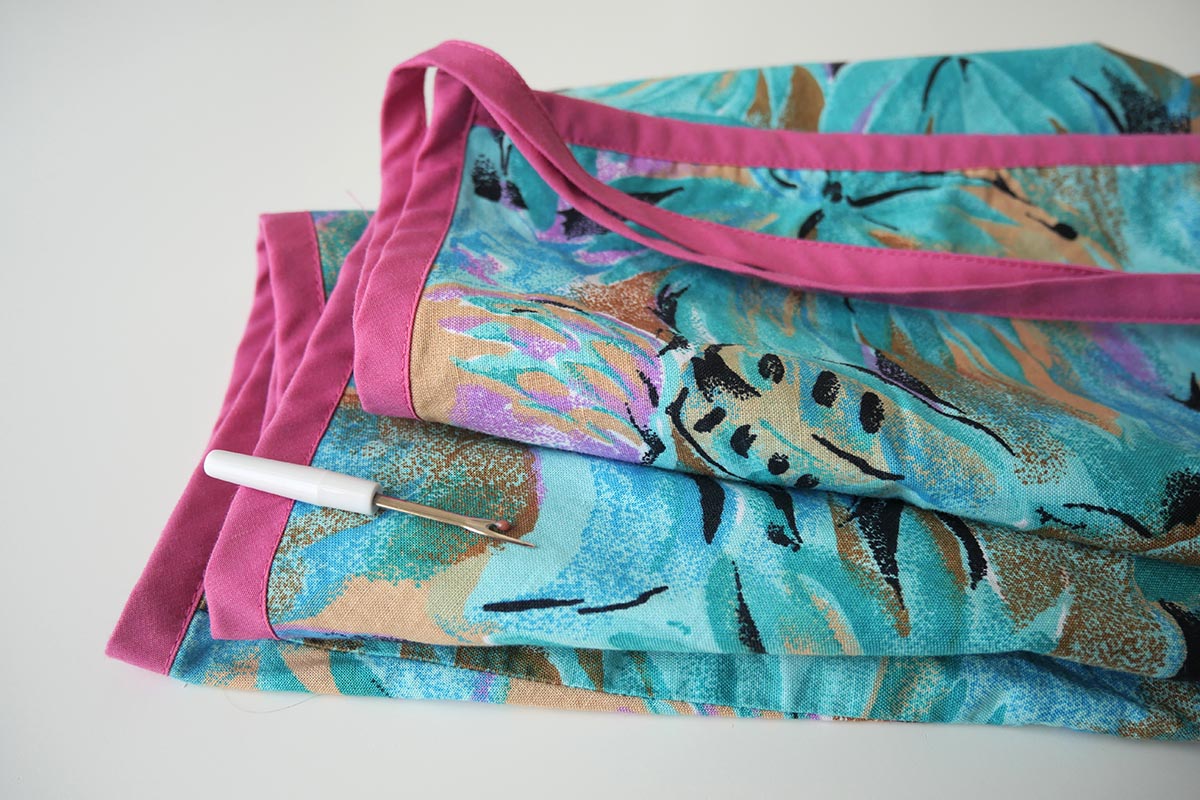
6. Binding The Sides
We’re now on the penultimate step – binding the raw edges at the sides of your DIY wrap skirt!
To do this, I like to create a sharp finish for the hem section of the bias binding – use this bias binding tutorial for more guidance.

Once you have the raw edge of the hem inserted into your bias binding, it is time to sew the binding all the way up to the waistline.

Now you should only have a raw edge of fabric along the top of the wrap skirt.
7. Finish Your Wrap Skirt With Ties
The final step is to create ties that will work to finish your waistline and wrap around the waist when you wear the wrap skirt.

I used the same bias binding tape that I used to bind the side edges of my new skirt, as it felt like a striking colour combination.
To make the ties, I cut three times my waist measurement in binding. Then I found the centre of this amount and lined it up with the centre back of the wrap skirt, pinning the bias binding tape over the raw edge and then simple pinning the tape together until I reached the ends.
I chose topstitching the bias binding in place so that it would be easier to create the ties in the same way.
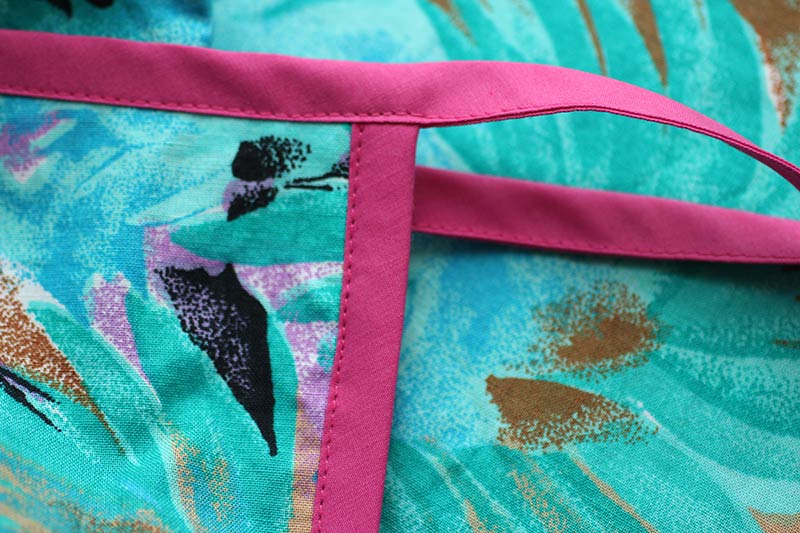
You could use your sewing machine to create a buttonhole at each side seam. This will help guide the ties around your waist and keep them in position.


I’m going to love wearing this DIY skirt for a last-minute holiday in Crete!


I think the wrapskirt is based on the Indonesian sarong and (less so) on the Indian sari.