How to Draft a Kimono Sleeve Pattern
In this tutorial you’re going to learn how to draft your own kimono sleeve pattern. I’ll also run through a brief history of the kimono sleeve as well as some frequently asked questions at the end.
Do check out my guide to the different types of sleeves as well so you can see other sleeve styles open to you – I’ll be adding in pattern making tutorials for those in the coming weeks too, but you can start by drafting the basic sleeve block as well.
And if you prefer video, I’ve added my kimono sleeve pattern drafting tutorial to my YouTube channel which you can watch here.

Some of the links in this article are affiliate links. This means that I may receive a fee at no extra cost to you if you purchase a recommended product.
What Is A Kimono?
Before we can cover what the kimono sleeve is and how to draft a kimono sleeve sewing pattern, we should first touch on the Kimono itself.
The kimono is a traditional Japanese garment that has been worn by men, women and children for centuries in Japan “stretching back to the Heian period (794-1185), although it was not until the Momoyama era (1573-1603) that garments resembling the modern kimono in terms of shape and patterning were first worn”. (Kimono: The Art and Evolution of Japanese Fashion Thames & Hudson 2015).
On a basic level the kimono is a T-shaped garment which wraps around the body, has long sleeves and a wide obi sash that is typically made of silk.
On a more detailed level, all the parts of a kimono are cut from one long length of fabric and use straight seams, with the main body seamed together at the center back and draped over the shoulders. The sleeves are then added – again with straight seams – and finally the neckband, front wrap and collar. The kimono is then fastened with an obi belt.
Though the kimono is centuries old in one form or another, in the earlier referenced book, Anna Jackson states, “The kimono became treasured as a cultural relic, and revered as the essence of what was Japanese in an increasingly globalized world…” and states too that the wearing of the kimono as an everyday garment in Japan has dramatically declined. Perhaps this is why the kimono sleeve became a more popular sleeve style used on dresses, blouses and jackets?
That said, the kimono is still a part of modern Japanese culture. It is not uncommon to see people wearing kimonos on special occasions such as weddings and funerals and while the traditional kimono is made of silk, there are now many different types of fabrics used to make them, including cotton and synthetic materials.
What Is A Kimono Sleeve?
The kimono sleeve in western clothing has evolved beyond what is seen in traditional Japanese kimonos. Where they were historically angular with a wide hem, now the kimono sleeve is a sleeve that is ‘grown on’ to the bodice pattern itself.
This is why it can now be found on a variety of garments, from dresses and blouses to jackets and coats – it’s easy to draft and construct in fabric form – and I’m going to show you how to draft your own ‘modern style’ kimono sleeve pattern!
What You’ll Need

In order to draft a kimono sleeve pattern you’ll need a few things:
- Bodice block – front and back
- *Sleeve block – one piece sleeve
- Pattern making paper
- Measuring tape
- Ruler / pattern master
- Pencil
- Paper scissors
*While it is completely possible to draft a kimono sleeve pattern without a sleeve block, I always use it for the most accurate final result. If you do not have a sleeve block you can use the measuring tape to find the length that you would like for your kimono sleeve length and width.
You’ll also want to think about how you want the kimono sleeve to fit – is it going to be close fitting and closer to the underarm – probably necessitating an underarm gusset – or with more ease for a looser fit? This is something you’ll need to know before drafting the kimono sleeve pattern!
The Front Kimono Sleeve Pattern

Let’s start with the front pattern piece. Trace off a copy so that you’re not modifying the original master copy.
Start by closing any bust dart that starts within the armscye / armhole area on your front bodice pattern. You can do this by pivoting or using the slash and spread method of dart manipulation.
Note: you can leave the dart in this area for the ease, but I prefer to pivot it out for my kimono block so that I can easily create more fitted designs, and I can always add it in again later if needed.
Raise the front shoulder point by 5/8″ / 1.5cm – this is the green dot visible on there’d / blue line below.

The Sleeve Pattern Method
If you’re using one, place your sleeve block so that the center notch on the sleeve head matches up with the shoulder line, and the front sleeve notch is in line with the notch in the front armhole. Ignore the mark from the previous step, this is to help us with our final shoulder line!
Now, we need to pivot the sleeve at the shoulder point to where you would like it. You can place the center of the sleeve so that it is in line with the original shoulder line – it will simply look like an extension of the shoulder line or you can make the angle more curved.
Now, using a patternmaster or ruler to guide you – or you can freehand if you feel confident enough – draw in a smooth line connecting the neck to the point you marked in above the shoulder line and down to the sleeve hem.
The Non Sleeve Pattern Method
If you’re not using a sleeve block, you would draw a line that continues naturally from the shoulder line to the length required. Make sure you measure your arm from the shoulder point to the wrist (or where you want the kimono sleeve hem to sit). I like to add 1/2″ / 1.25cm to this for a little ease in the length – we can always shorten the sleeve later if need be.
As we did with the sleeve pattern method, make sure that the line is nice and smooth and incorporates the rasied shoulder point too.
The Sleeve Hem
Now we need to square from the top / shoulder line of the sleeve half the amount you want your sleeve opening to be. This is where your arm will come out, so make sure there is enough space or consider an elasticated, zippered or cuffed opening.
You’ll also want to mark in a 90º angle as we like to square our undersleeve line before curving it into the stylised seam line.
The Side Seam
Now you need to decide the styleline of the side seam, which will form the undersleeve seam too.
As mentioned further up in the ‘what you’ll need’ section, the higher up the side seam this line sits, the more restrictive movement will be, and an underarm gusset may be needed to ensure mobility. At the same time, if you lower the styleline too much you wander into batwing sleeve territory.
Below are a few examples of kimono sleeve patterns I have created.
The Hem
Finally, you need to decide how long the front of the bodice will be. Will it be high hip length? Mid thigh length? The decision lies in what you plan to use the kimono block for. I would suggest simply squaring across from the center front, as this is your initial pattern, and can be modified in many creative ways moving forwards.

Your front kimono pattern should now look somewhat like the image above. Remember that mine is a close fit bodice block so the dart is quite large – your’s may look different.
The Back Kimono Sleeve Pattern

Now we move onto the back. Trace off a copy of your back bodice as you did for the front.
Start by closing the shoulder dart if you have one – you can pivot it into the back armhole, which will just add a little extra ease at the armhole. Then raise the shoulder point by the same amount used for the front – I raised mine by 1/2″ / 1.25cm (0.75cm for my half size dress form).
Next, place the front pattern you created underneath this new traced back pattern. We can actually trace off what we need, speeding up the pattern making process!

Ignore the center back and center front lines – it’s perfectly ok for them to not line up as you can see in the above image. Instead, we want to match up the shoulders from the neck point, and make sure that the center front and center back are equal distance apart from the neck to the hem.
Trace off the shoulder line for the front pattern piece, all the way down to the sleeve hem, across the sleeve hem and then along the undersleeve styleline too and then continue around the back bodice block.

You now have both the front and back pieces ready to trace off and use! If it doesn’t make sense, make use of the video tutorial at the bottom which goes a bit more in-depth on the pattern making process.
Create A Mock Up

In order to test the block, you’ll need to add seam allowance and sew the kimono sleeve bodice together. Remember that I have not added any wearing or design ease to my bodice block pieces, so when I sew this up, it will be very fitted to the bodice with a kimono style sleeve extension.

I cut my front bodice on the fold and my back as a pair, so consider this too so you add enough seam allowance to pin for the test fit.
The Shoulder Seam
Start by sewing the shoulder seam. Make sure to line up the front and back piece wrong side together – use the notches you’ve added in as a guide – and sew from the neckline down to the sleeve hem. Repeat for the opposite side.
Side / Underarm Seam
Now it’s time to sew the side / underarm seam. I start at the waist, and sew up the side seam, around the underarm curve and then along the sleeve seam.
Repeat for the opposite side. Don’t forget to clip the curved seams on the underarm so that the fabric lays nice when turned through.

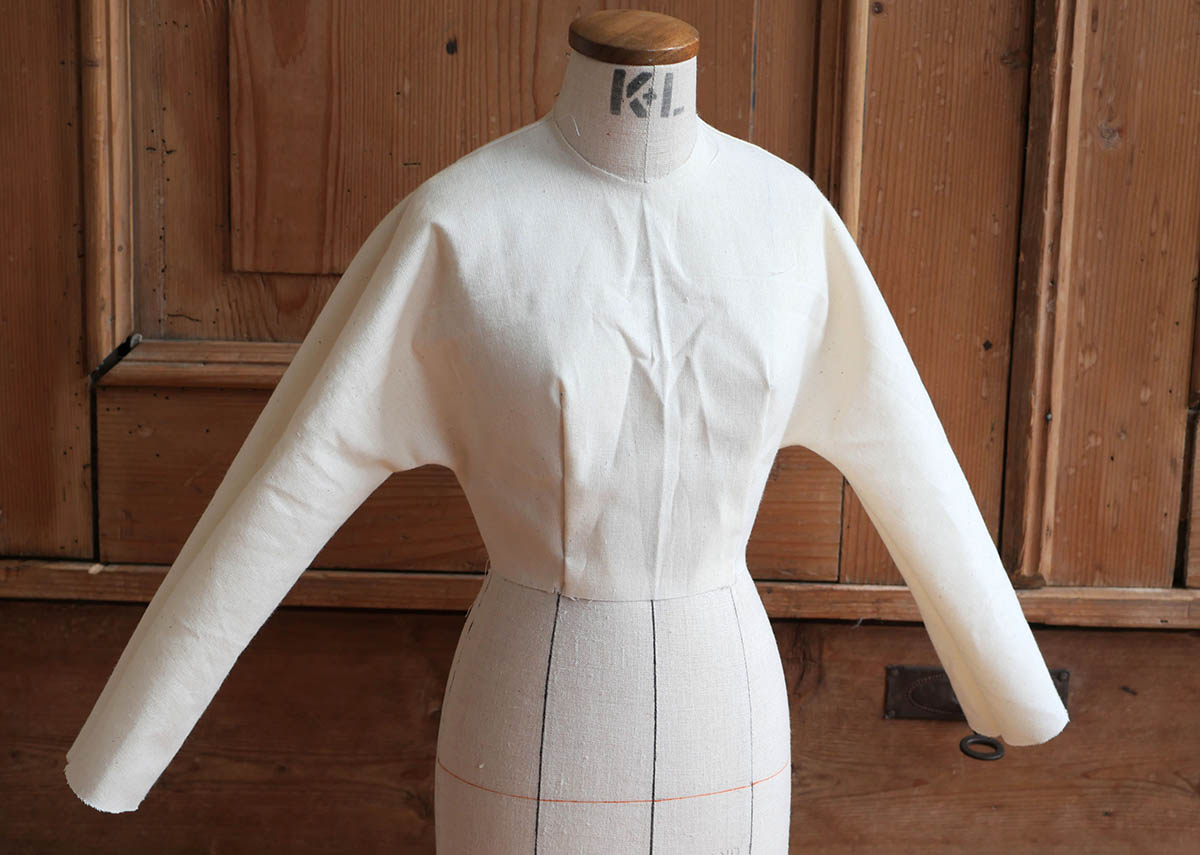
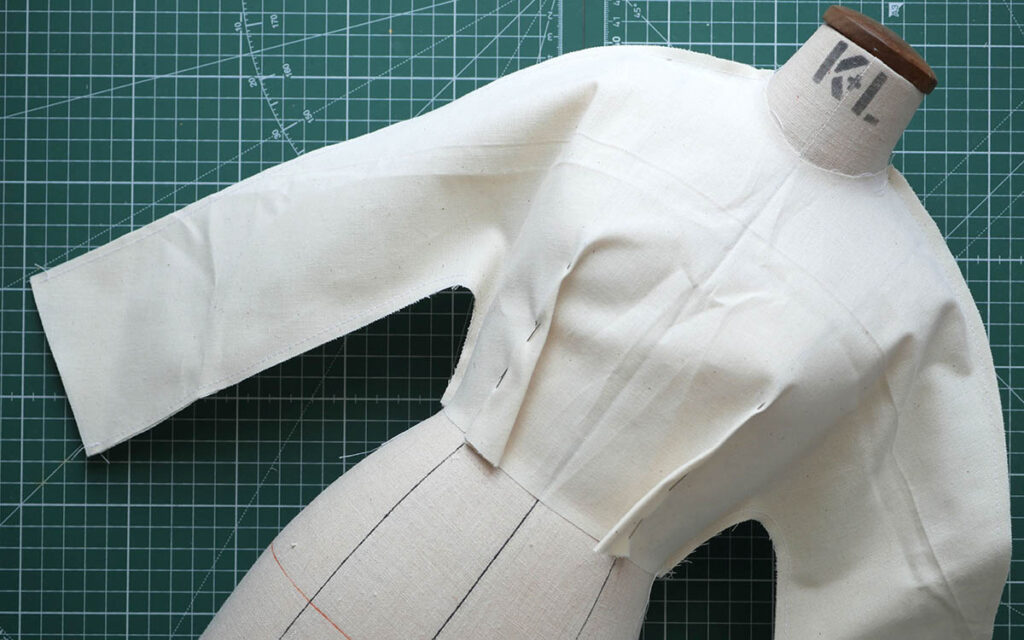
You’re now ready to test the fit and see how the kimono sleeve turned out.
How To Use The Kimono Sleeve And Bodice Block
In the photo below you can see that I left the front bodice darts unsewn to see how the bodice and sleeve looked with more ease.

I then pinned the darts in place as well, to check how things looked when more fitted.


Now that you have completed both the front and back kimono sleeve / bodice block you’re able to use it in many creative ways.
Use the close fit version to create bodycon dresses and tops that have kimono style sleeves, but you can use the same method on a looser fit block to create a kimono sleeve inspired shirt, jacket or coat.
You could have the shoulder seam be completely straight line which will allow you to have a folded edge for the shoulder line instead – there’s no limit to your creative options, but I do suggest that you make a mock up / toile each time, even only half, to check that there is enough ease to allow arms to move, and the body to breathe.
Fabric Choice
Finally, it’s important to consider your choice of fabric when drafting garments with a kimono sleeve. A lightweight fabric will create a beautiful draped kimono style dress or blouse while using a heavier weight fabric such as denim or wool would be more suited to an outerwear garment.
Kimono Sleeve Pattern Making Video Tutorial
If you do prefer video over text and images, I have got a video tutorial on how to draft a kimono sleeve pattern up on my YouTube channel!
Will you be drafting a kimono block for yourself to use in future projects? Let me know in the comments.


Love this tutorial. Simple and easy to follow. Kathi w
Ah, thank you for your lovely feedback Kathi, I appreciate it! Best, Eve
Clear, concise instructions that have been so helpful. Thank you Eve!
Lesley
Ah, thank you Lesley, I appreciate your kind comment!