A Step by Step Tutorial On How To Put Eyelets In Fabric
If you’re into sewing, you will probably at some point need to know how to put eyelets in fabric. Eyelets – and grommets too for that matter – are circles made from metal, that can be inserted into fabric to create a clean finished hole.
There are usually two parts to eyelets and when pressure is added to connect the two, you end up with a hole in the fabric who’s raw edges are enclosed.

Some of the links in this article are affiliate links. This means that I may receive a fee at no extra cost to you if you purchase a recommended product.
What Is An Enclosed Hole?
What do I mean by this? If you were to take a piece of fabric, and cut a small hole in it, the edges would be raw and the fabric would fray.
When we sew button holes, the raw edges of the fabric are wrapped in thread to contain the raw edge and stop the fraying.
Inserting an eyelet does the same thing, by wrapping the raw edge of the hole in metal. This makes it much less likely that the small hole will fray into something bigger.
When Are Eyelets Used?
Eyelets aren’t used in the same way as button holes, but they are used in other ways:
- Lacing up corsets
- Cord exit points for drawstring waistbands
- Drawing the tops of canvas rucksacks closed
- Decoration on leather garments and accessories
- Used as a way to control gathering on an adjustable garment
So there are quite a few ways that eyelets can be used.
Eyelets vs Grommets

Now, to clear up any confusion, eyelets and grommets are the same thing, they simply differ in size.
- Eyelets are the smaller ones, that you would see in your shoes, and the backs of corsets.
- Grommets are the larger ones, and used more in bags, outerwear and home furnishings.
Both eyelets and grommets have a hole in both parts of the eyelet.
The first part, which goes through the fabric hole is the main section, and has a shank, which get’s ‘crushed’. The photo below shows what an eyelet or grommet looks like once the shank has been crushed.

The second part is the washer, and is relatively flat. This is the section that the shank of the first part wraps over, enclosing the raw edge of the fabric.
The photo below shows the underside and you can clearly see that the washer has been wrapped by the top part.

Sometimes, eyelets are sold as just one piece, with no washer. These are still eyelets, but they’re a cheaper variety, and when put into fabric, they split on the reverse and don’t look great. I’ll show you more on this further down!
Essential Tools You Need To Put Eyelets In Fabric
To learn how to put eyelets in fabric, you will need some tools. The most important is the tool you will use to ‘press’ your eyelets and grommets with. There are four options to choose from:
1. Eyelet Press

The best way to get a perfect finish is to use a special eyelet press. These can be very heavy. They can be sensibly priced like this one, if you’ll use it often enough, or be silly expensive and suitable only for a design studio.
2. Piston Pliers

The next option is to use a pair of piston pliers. This is what I use.
These were a bargain from a man clearing out shop, and are solid, high quality. Made in Italy too, so I expect them to last me a lifetime.
They are easy enough to use (when not trying to photograph the process) and work well.
3. Eyelet Pliers

These do not have the same ‘ease of use that piston pliers have, but they are much more wallet friendly.
I use these ones from Prym, and they work brilliantly. They are much lighter than my Ciac piston pliers, so I can keep them in my travel sewing kit too!
4. Hammer
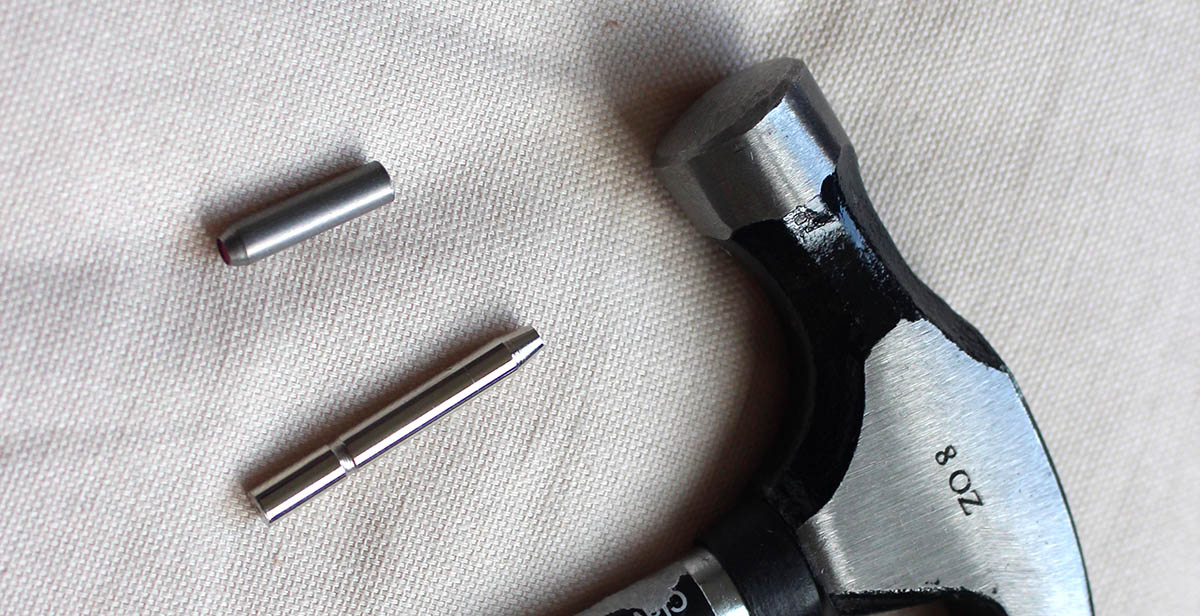
If you do not have the funds for either of the previous options, you will need to use a hammer. I have two styles that I use:
- This one which is a small stubby hammer, allows me more control and is small enough to take in my portable sewing kit.
- And this one, which is longer, more traditional but often ends with me damaging my thumb and finger! I have an 8oz version, so that it doesn’t;t weight too much, but I wonder whether a 16oz version may provide more oomph?
Additional Items For Putting Eyelets In Fabric
Other things you will need are:
- Fabric to practise
- Reinforcement fabric / fusible interfacing
- Hole punch
- Pen or chalk
- Scissors
- Eyelets
- Grommets
Practise Fabric
Always make a practice run. Knowing how to put eyelets in fabric in a way that looks professional can take time, so don’t rush it, and practise first! 🙂
Reinforcement Fabric
I like to reinforce the area where I am placing the eyelet or grommet by using a second layer of fabric or a fusible interfacing.
This just adds a little more structure to the main fabric so that the eyelet or grommet doesn’t distort the fabric.
Hole punch
When it comes to putting eyelets into fabric, you do need a way to make a hole in the fabric. If you’re working with just fabric, you can easily get away with using small scissors.
I prefer to use a dedicated hole punch, with a variable size system, that I can use on fabric, leather and other materials too. I use this one and it has lasted me quite a few years.
Definitely worth the investment, if you’re going to be adding eyelets or grommets to garments in the future, other wise you could buy the Prym holepunch.
Pen or chalk
I use pen or tailors chalk to mark EXACTLY where I’ll be putting the eyelet. This prevents me from making a mess of things! 🙂
Scissors
If you have decided against investing in a hole punch, then scissors will be essential. Fabric scissors obviously, and you’ll want them to be smaller than your fabric shears as you will need more control on a small scale to be really accurate.
This pair is great for the price. Or if you want to invest a bit more into scissors that give you more precision on small cutting work, this pair is fab!
Eyelets
Yes.. without eyelets, we have no way to add them to fabric! I have ordered from different suppliers, but find it easier and faster to order a variety from Amazon.
This colourful pack of eyelets would add an interesting flourish to your makes.
Grommets
Grommets being bigger than eyelets, will require different ‘bits’ which you’ll use to put the eyelets in fabric.
These solid brass ones come in either a kit or as a refill. The kit comes with a cutter, mandrel / anvil, wooden block and 12 grommets. You can then buy more grommets as needed.
Don’t forget though, that if you decide you need a smaller size grommet, you will need to buy the bits for the smaller size. I have multiple die pieces for this purpose!
Reinforcing Your Fabric For Eyelets
If you are adding eyelets or grommets to your garment, you will need to reinforce the fabric. You can do this with fusible interfacing, or and additional piece of fabric.
For both techniques, cut a small square and place where your eyelet will be inserted. For this example, I have simply grabbed a small section.

Marking The Location Of Your Eyelet
Before you can put eyelets in fabric, you need to carefully mark where you want the eyelet to go. I do this with a pen, marking a cross for accuracy. You could also simply mark it with a dot.

Making A Hole For The Eyelet
Now that you have the spot marked, you need to create a hole for the shaft of the eyelet to pass through. There are several ways to do this.
Using Scissors
If you are using scissors to create the hole, I like to make a small x, with precision scissors. This allows us to manoeuvre the eyelet shaft in carefully, without stretching the fabric too much.

Using The Hole Punch
If you’re using the hole punch to create holes for eyelets, you will have a greater choice of pre-determined hole sizes. This photo shows the six different sized holes I am able to have with my hole punch.

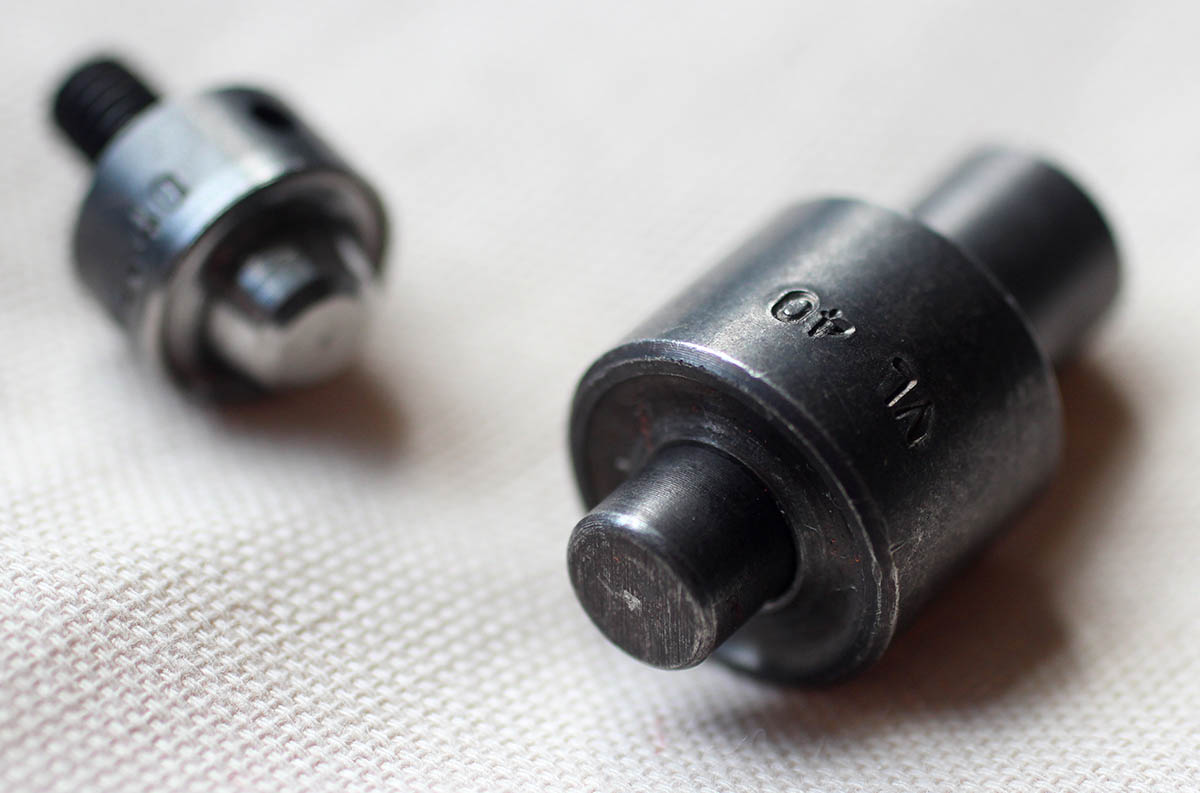
Using The Hammer and Bits
For anyone that prefers the circular hole vs a cut x, but does not want to invest in the hole punch, this technique is for you.
It takes more effort, and is not as accurate, but it does work.
- Place the bit over the spot you have marked
- Hold in place with one hand
- Take up the hammer in your preferred hand
- Use the hammer to ‘punch’ the bit and create a hole
Step 1: Find your hammer and hole punching bits.

Step 2: Find the fabric you want to hole punch. I’m going to use this piece of leather.

Step 3: Apply the hole punch bit and hit with the hammer.
You can see that this leather is quite thick, and the hole punch bit did not pierce all the way through.

Step 4: Hit the hole punch bit harder until it does cut all the way through.

How To Put Eyelets In Fabric: 3 Techniques
If you are going to put eyelets in fabric, there are three techniques to consider.
1. Using Eyelet Pliers
When using eyelet pliers, you first need to buy some pliers (grab the Prym pliers here!) and make sure to have the right ‘bits’ for the eyelet size that you are using.
You can see in the photo below that I have my bits ready to use.
Step 1: Attach the bits to the pliers.

Step 2: Find out an eyelet that is the correct size for the installed bits.
I’m using a single eyelet, without the washer section.

Step 3: Take the fabric that has a ready prepared hole.

Step 4: Insert the Eyelet into the hole. Make sure that the shaft is extending from the right side to the wrong side!!!

Step 5: Place the right side of the fabric, which has the ‘good’ side of the eyelet on top of the plastic part of the pliers.

Step 6: Squeeze the pliers closed so that the metal part of the bit comes down and connects with the eyelet shaft.
I find I have to use both hands to squeeze it hard enough for the pressure to ‘crush’ the eyelet into place.
Step 7: Admire your handiwork!

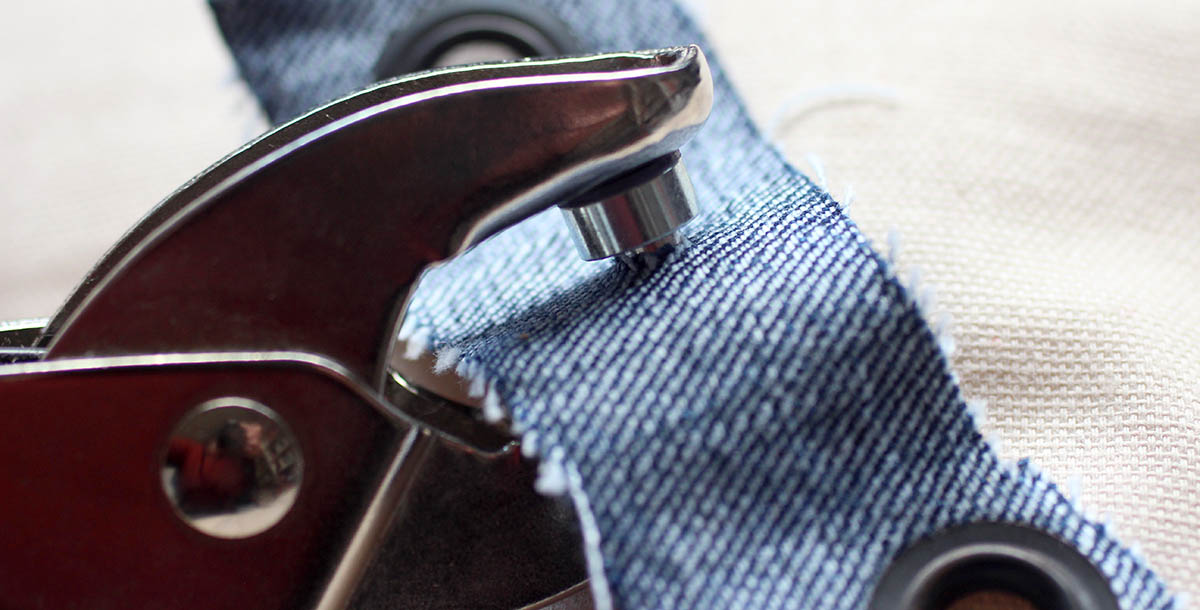
2. Using Piston Pliers
I find using piston pliers easier, but I suspect it is because I’m a bit of a wimp and the piston part of my pliers takes some of the effort out!

Step 1: Find out the two pieces of your eyelet ready to install.
Step 2: Insert the shank of your eyelet into the hole in the fabric, with the fabric facing right side down.

Step 3: I have chosen to reinforce the fabric with a second piece of fabric, so I lay this over the eyelet too.

Step 4: Lay the washer part of the eyelet on top of the fabric layers, making sure it is placed the right way.

Step 5: Load the bits (die) onto the piston pliers. Be sure to insert the correct piece into the correct section!


Step 6: Place the eyelet in position on the bottom part of the pliers.

Step 7: Slowly squeeze the pliers together, exerting enough pressure to squish the two die pieces together and crush the shaft of the eyelet over the washer part.


Finally: Admire the beauty of a properly inserted eyelet!


3. Using The Hammer
The third way to put an eyelet in fabric us using your hammer. Now, you will want a rather sturdy hammer for this, in order to apply enough oomph to crush the shaft of the eyelet around the fabric hole. For his technique, I’ll show the process with leather.
Step 1: Find out your hammer, eyelets and the correct die bit.
Typically they come with a plastic piece that folds on itself – a bit like an E shape without the middle line – and this encloses the die bits / eyelet / fabric. I’ve lost mine, so I’ll be bashing my eyelet on a special board.

Step 3: Insert the eyelet shaft through the hole you created previously.

Step 3: Use the hammer with some force, to crush the shaft of the eyelet over the fabric / leather.
You can see from this photo that I don’t have the skill without my missing plastic section, so I have to go back to the pliers to finish the job.

Step 4: Having switched to the pliers, I have successfully put the eyelet into the leather piece. Yay!!
Notice how the back of this eyelet has split.

From the right side though, it looks lovely!

How To Put Eyelets In Fabric: Concluding Thoughts
As you can see – putting eyelets in fabric can take time to get a beautiful finish, and often the tools you choose to use will help influence the outcome.
If it hadn’t been for getting my hands on the piston pliers for a bargain price, I wouldn’t know how much easier they are to use.
That said, they are currently in storage, and I have the Prym pliers with me to use on anything I make in the next six months that needs eyelets.
The one thing I will say – use the hammer method as a last resort! It does not give the cleanest finish, but in a pinch, will work.
Recap Of Supplies Needed
Here’s a recap of tools used that you can get too – just click the link to grab your own!
- Holepunch
- Prym Eyelet Pliers
- Hammer
- Scissors
- Eyelets
- Grommets
- Eyelet Press (if likely to be pressing LOTS in the future!)
Have you put eyelets in fabric before? Which technique have you used, and how did it work out for you? Let me know in the comments below!!


Thankyou for this great tutorial. I’m going to try putting these into a suedine vest.
Ooooh, that sounds fab! Let me know how it works out for you Linda! 🙂
I make a combination of medieval with modern shirt for men and I chose to close the necklace with eyelets and leather cords. I have used for years, almost 10, the same Prym pliers. Very useful. Only take care not to use the plastic head on the rong size of the eyelet.But after 20 eyelets your hands wil be numb. I intend to buy this year an eyelet press though with my increased orders.
Yes! It can be hand numbing if you are hand pressing many eyelets! The press will be a great addition to your kit I’m sure! 🙂 I see you’ve an Etsy shop – will pop over to take a peek!
I have never made eyelets or used grommets before! I’m such a “Visual Learner!!” .. Wish there was a Tutorial to Demonstrate!! Which tool would be Best for me.. a Beginner?? Thank You!!
I just bought a Dritz eyelet pliers kit for a 1/4 inch eyelet. I’ve been practicing but keep crushing the eyelet. It looks terrible. I know I need to keep practicing but it is quite frustrating.
Hi Kathie! Want to add a photo? I may be able to spot what isn’t working right! 🙂
Kathie.. Maybe this is the tool I need! I’ve never done this before, & it’s a bit intimidating!! Have you seen any videos on how to use these pliers?? Thanks!!
Hi! I want to order an eyelet and tool kit from Amazon, but what I’m unsure about are the sizes! Here in Eurole they are given in mm. That’s no problem for me, but does the given size indicate the inner circumference (the actual hole) or the entire eyelet? What size, for example, does the standard sneaker eyelet have? Thanks a lot
Hi Lola! The size is always the diameter of the inner hole of the eyelet. For sneakers, they are usually 5 or 6mm diameter, but you could of course go crazy and use oversized versions too! 😉 When you’re not making for sale, you can get more creative! If you have any other questions, do let me know!
Never tried it but will seems easy enough
Hi Sharon! Yes – it is easy once you’ve got some practise in! I started out with some terribly crushed eyelets and grommets when I first started! Yikes! 🙂 Thanks for popping by! Best, Eve
Can I fix an eyelet that has fallen off or do I have to put an entirely new one in? There is only one piece, not two, so I’m not sure if that’s normal or if there was something different about the eyelet.
Hi Lyn, what is the state of the existing eyelet? It is possible for eyelets to only have one part rather than two, but they’re usually less efficient. It’s likely that you won’t be able to reuse it, as it should have been somewhat ‘crushed’ when added to your garment, and used eyelets don’t work so well wth tools. Hope this helps!
If you mean the one that fell off, it looks like just the top part but the shank is a lot shorter. It doesn’t seem damaged and it’s not split on the other side. Looking at the other ones on the skirt, it looks like they don’t have a second piece at all, but both of these could just be the crushing. There’s another eyelet that looks like it is going to fall off; the fabric is coming out and is now partially covering the top of the eyelet. I don’t exactly know what is going on since I am just a total layman hoping I can fix the skirt myself but thank you so much for the help!
Thanks for the pointers. I used a hammer variation. You put me on the right track for the ultra-cheap easy bang-bang done, and looking pretty good. Thx bunches.
Having just made a total mess of adding eyelets to a new garment by following the instructions on the packet to use a hammer, I shall follow you method in future. Thank you!
Hi Amanda! Oh, that sounds like you had a bit of a situation! Sometimes those instructions with tools are rubbish. Glad that this tutorial was more helpful for you!
What brand of eyelets and grommets and a nice weight. I bought some on-line and they are way too thin to be really useful, even in quilting cotton. Was adding eyelets for yarn for knitting bags.
An eyelet and a grommet are a different thing to a sail maker.Not just a difference in size .I enjoyed reading your site, thanks. Brian
First project I brought hemline eyelets. I followed the instructions on the packet, used a hammer and they came out wonky (difficult to hammer in one go evenly). Second project I needed different size eyelets and having brought the Prym pliers for snap fasteners I used those. Definitely better than a hammer but need to be strong to press hard.
Your article helped me decide that it is worth spending slightly extra and getting the eyelets with washers.
A little history. I’m 83 years old, sewed with obsession for many years but became too busy & hadn’t sewn (except for mending) for many more years. When I became a widow & had to move from my home to an apartment, I picked up where I had left off & sew for my neighbors regularly as well as myself. Decided to make a fabric “Quiet Book” for a new great grandchild & the pages are held in via eyelets. Making the pages was a challenge, but when finished I was fearful of being able to put in the eyelets as I hadn’t done it in years & didn’t remember how. Found you on the internet to refresh. Not having the tools you mentioned, I used the hammer method w/the little tools that came w/the eyelets & they came out perfect – on both sides. Thanks for the primer!
Super cool! I am looking to add grommets to my toolbelt. I work in the HVAC Industry and thought I’d add some advice to your Hammer tutorial. To avoid busting your hands or thumbs use a pair of needle nosed pliers to hold the die and then hammer the die down. Thank you for sharing your knowledge!
Hi Armando – that’s great advice, thank you!
Thank you so much for this. I have the eyelet grommet pliers & the grommets I have are the inexpensive ones and I didn’t know I was supposed to be making a hole before squeezing the eyelets or grommets together. Also didn’t know there was a different type with 2 pieces. Thanks so much.
Hi Christine. Glad that the tutorial helped you. Remember that the hole you make should be smaller than the eyelet or grommet you’re inserting, and interface it on the wrong side if possible first before cutting.
Learning how to put eyelets in fabric has been on my to-do list for a while, and your blog post provided just the guidance I needed. Your clear instructions and helpful tips make the process less intimidating. I can’t wait to give it a try and add some beautiful eyelet curtains to my home. Thanks!
OMG. THANK YOU!
The tutorial was excellent! I bought a set with hole punch and pliers. I couldn’t even read the instructions as they were so tiny and pale. Being a visual learner you are a lifesaver. Thank you
Ah, you are so very welcome Nancy, I’m really glad that you found the tutorial so helpful!