A Detailed Guide On Patching Clothes
Many of us who sew our own clothes are also keen on refreshing those items of clothing that need a little TLC to remain wearable. This detailed guide covers all of the different ways in which we can patch up our old clothes to breathe new life into them for even more wear.
Like many others, I believe that being able to patch up our clothes is one of the best ways to be more sustainable with our fashion, but as well as reducing waste and extending the life of our clothes, patching is also a great way to save money.
To patch we can either mend or reinforce fabric with a patch, and the patch can provide a discreet repair or be a more decorative element covering a small hole that is very visible.

Patching Clothes Vs Buying New
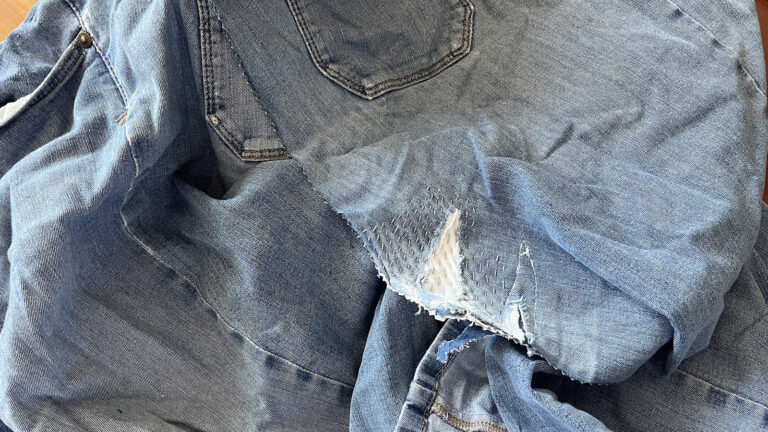
The first time I ever patched a garment was because I couldn’t find the exact same pair of jeans anywhere. I wore them all the time, and the denim fabric at both the inner thighs and the crotch slowly became thinner and thinner until it was impossible to wear them without baring all! Not a great look!
And so began my patching journey, and I have continued ever since.
Yes, I could have just bought new jeans, but for what purpose? We live in a world where fast fashion has become the norm and people readily fall into the trap of buying many new clothes each season just to be ‘current’ – we can blame the fashion industry for this, with it’s never ending showcasing of fashion trends! – but this never ending cycle of consumption and waste is harmful to the planet and not at all wallet friendly either!
Now I’m not here to bash anyone that needs to buy new clothing, but I do feel I should share the benefits of mending clothes with patching if you already have something that works and just needs a little extra love. This could be a favorite sweater, your favorite denim jeans or a small tear on an article of clothing.
Materials For Patching Clothes
Let’s take a look at some of the materials you will need to start patching your own clothes, because getting this right will make the whole process fun and enjoyable with a gorgeous result to be proud of!
Fabric Choice
You need to choose a fabric that is most suitable for the garment you are planning to patch, but you’ll also want to consider how visible you want it to be. Things to consider include:
- Fabric type
- Fabric weight
- Fabric color

As an example, you wouldn’t want to patch a pair of twill pants with a lightweight cotton lawn seen in the brave photo. So consider carefully the fabric of the garment you are patching and the possible fabrics you could use to patch with.
Types Of Patches
As well as using fabric from your stash as a patch, you can also use other types of patches. These include:
- Adhesive patches
- Iron-on patches
- Sew-on patches
If you’re only wanting a temporary patch, then an adhesive patch is a good option. It will struggle to hold up over time, but they can be quite useful and effective in the short term. You’ll find that iron-on patches are by far the easiest to use while providing more durability than adhesive patches. These iron on patches also have a glue on their wrong side, but require the high heat of an iron to melt the glue and secure them.
Finally, sew-on patches are the best and most durable patch type, but will take more work to get them attached.
Thread Choice
As well as choosing a fabric or patch, you will also need to think about the thread that you will use (if using a sew-on patch). You can match the color of your thread to the fabric or to the garment you are patching. Alternatively you could opt for a more contrasting thread color to make the patch stand out as a design detail.
Stick to normal polyester thread if possible as it is stronger and more durable than cotton thread. Embroidery thread is also an option, but generally it is not as strong as a normal polyester thread.
Creating Fabric Patches
Now that we have covered the types of patches I feel I should give an overview of how patches of fabric can be made.
You’ll need a piece of fabric that is a suitable weight – thin fabrics for lightweight clothing and small repairs, heavier fabrics for those garments that are in need of more durability.
Prepare your patch as followers:
- Raw edges should be turned under (to the wrong side) if the patch will be sewn to the right of the garment.
- Optional extra for the above patch is to seal the edges into place with a strip of adhesive webbing, to prevent fraying.
- Raw edges can be finished with a zig-zag stitch or serged / overlocked if they will be placed on the underside of the garment.
And that is about it. You can now apply the patch to the garment needing it!
Patching Techniques
Now we get to the fun stage, patching!
There are three methods for attaching your patches to you clothes:
- Hand sewing
- Machine sewing
- Ironing
Let’s take a look at each method in turn.
Hand Sewing Patches
If the more traditional approach is your thing – or you just have more time to slow down and enjoy the process – then hand sewing your patches on is a great option. You can choose from several hand stitch types, with each having strengths and weaknesses:
- Back stitch: a straight stitch that is worked backwards rather than forwards like the running stitch.
- Basting stitch: a form of running stitch but each stitch is longer.
- Blanket / Buttonhole stitch: a decorative stitch that looks like the stitching found on edges of blankets and buttonholes.
- Catch stitch: a criss-cross style stitch, it is very visible on the wrong side of fabric but not usually the right side.
- Ladder stitch: an invisible stitch type that forms a ladder on the wrong side but is invisible on the right side.
- Running stitch: a straight stitch, sewn forwards.
- Satin stitch: stitches that are sewn close together to cover an area.
- Slip stitch: same as a ladder stitch, just a different name for it!
- Whip stitch: a diagonal stitch that covers the edge of a piece of fabric, like the blanket stitch
In order to hand sew, you’ll need a suitable hand sewing needle, thread and a fabric patch.
Start by trimming away any fraying edges around the hole of tear in your garment. This will help to prevent further damage.
Next, cut a patch of fabric that is slightly larger than the area in need of patching. Pin this patch into place.
I like to ensure that the grain of the fabric patch is in the same direction as the grain of the garment fabric.
Using your needle and thread, carefully sew the patch into place, using the stitch style that you prefer. I like to baste the patch first with a running stitch so that I can remove the pins, then I take my time and sew with either a neater running stitch or a more decorative stitch – it depends on the fabric patch that I am sewing.
Make sure that you have secured the end of the thread – and the beginning – with a nice knot.
Machine Sewing Patches

If you prefer a faster mend, then grab your sewing machine!
The steps for sewing a patch on with a sewing machine are the same, but you’ll want to use a zigzag stitch to properly secure the patch. IT will help to stop any fabric edges from fraying while keeping the fabric patch secure in its place.
Ironing On Patches
Finally, the quickest method of them all is the iron on patch. For this you will need either specific iron-on mending fabric or a piece of fusible web, which is a fine ‘spider web’ like adhesive. It generally comes on a roll when I buy it, with a layer of paper to prevent it sticking together, but you can buy it in prepared sheets from online stores.
Start by cutting a patch of fabric at the size required, and the same again in adhesive webbing.
Place the webbing on the wrong side of your garment, and then pop the fabric patch on top, with the right side facing down.
Slip a piece of greaseproof paper underneath to protect your work area from any adhesive that won’t be sandwiched between the fabric and garment.
Take an iron, and press the patch, so that the heat of the iron melts the fusible web and bonds the fabric patch and garment together.
This iron-on method is best for smaller tears and holes that don’t require too much reinforcement.
Common Patching Scenarios
There are quite a few scenarios that will require patching, so I thought I should quickly cover them.
Patching Holes
To patch a hole, you’re going to want to cut away any loose threads which will clean up the area around the hole. I actually like to leave some threads if working a patch on denim, just because it helps to give that ‘lived in’ feel to my jeans.
Once you’ve selected and pinned a patch in place, double check that it is covering the hole completely and then sew around to secure it! I like to tuck away some excess thread by sewing along the inside of the patch from the wrong side, just so that I have it to hand if I need to do any additional stitches at a later date.
Fixing Tears

When you need to patch a tear, you can pretty much do the same as you did for patching a hole! Clean the area around the tear, choose a patch to match your fabric – unless you want it to contrast of course! 0 and then sew along the edges of the patch to the garment. You can do this by hand or with a sewing machine.
Mending A Rip
If your garment has suffered a rip, then you’ll need to be a little more strategic with how you patch it up. I like to use the fusible web that I have to fuse the edges of the rip back together. You can use strips of web, or a big patch.
Next, cut a patch of fabric that is larger than you rip, and pop that on the inside of your garment, on the back of the fabric, beneath the ripped area. Turn under any raw edges on the fabric, and then sew along the edge, either by hand or machine, to secure the patch in place. I like to hand stitch along both sides of the rip as well, with a hidden stitch, just to add a little more strength.
Repairing Pockets

Pockets often need repairing, especially the back patch pockets on my jeans! I think it’s because I’m always stuffing a phone or my hands into them, and dragging the pocket downwards – it puts a lot of strain on them and they can rip if the original stitching was not well done.
Start by removing the pocket from the garment, as it is easier to patch a pocket in the flat. Repair the hole as I’ve detailed before, and then when you’re happy with it, you can sew the pocket back onto the garment. Winner!
Applying Elbow Patches
We’re so used to seeing elbow patches as a design detail on new garments that we easily forget that the common elbow patch is actually something used to to repair worn away elbow areas on sleeves! They are a very stylish way to repair and reinforce any worn-out elbows on your clothes, and with the right fabric choice and shape, you’ll end up with a very unique piece of clothing!
As sleeves are relatively narrow tubes, you may find it tricky to machine sew an elbow patch into place. If your sewing machine is a free-arm type, you should be able to get the sleeve into place. Otherwise, hadn’t sewing is your method for this patching process!
More Advanced Patching Techniques
The above methods and scenarios are easy and beginner friendly, but what if you’d like to try out a more advanced patching technique? In the last few years there has been a surge of interest in visible mending and Sashiko, two methods to create more creative and interesting mends to clothing.
Visible Mending
Visible mending uses more decorative stitches and fabrics so that you can create patches that are both functional and creative, providing a more distinctive and unique look to whatever it is that you are mending.
Tools hat you’ll need if you want to give visible mending a go are:
- Needle
- Embroidery thread / embroidery floss
- Fabric
- *Hoop
While the hoop is not essential, you may find it helpful for keeping the garment and fabric patch layers together. For more inspiration and guidance on visible mending do check out the gorgeous book Mending Matters by Katrina Rodabaugh.
Sashiko
Sashiko is a Japanese mending technique. It has been used for centuries to repair and reinforce clothing and involves using neat stitches – running stitch usually! – to create geometric patterns on fabric. Sashiko patches are normally made with thread in a contrasting color, which helps to add a decorative feel to the garment. To create a Sashiko patch, you will need a needle, Sashiko thread, and a piece of fabric that is suited to the garment.
You can learn more about sashiko with this wonderful book!
Patching Tips And Tricks
Finally, some tips and tricks to help you on your patching journey!
- Take time to practice your skills, more so if your plan is to hand sew rather than machine sew. I have been known to grab a scrap of fabric and just sit and practice my hand sewing skills so that I can get a nice and neat finish on my hand sewn patches. This is even more important when you want to experiment with more advanced methods like Sashiko.
- Create your own patches. This is easier said than done if you do not have an embroidery machine, but appliqué and reverse appliqué are additional methods that can be used to make patches that can then be sewn on when needed! You’re unlikely to find anyone wearing anything with a patch the same as yours.
- Make patches more personal. This is similar to creating your own patches I guess, but when I say make them more personal, I mean in terms of your interests and personality. If you like animals or certain flowers, you can create a stash of patches that are just animals or just flowers and then have this ready for when something needs a patch or two. Creative and unique.
- If the patch isn’t staying in position, and you can’t stand using pins, then try some spray adhesive to temporarily attach the patch to the garment. It works a treat!
- It’s a good idea to use an appropriately sized needle to sew your patches into place. A needle that is too small will take more work, while a needle that is too big will leave visible holes in your patch.
I hope that was helpful in guiding you through the process of creating fabric patches and applying them to your clothes to breathe new life into them. I really enjoy the patching process, and hope you enjoy it too!