
How I Created My Favourite DIY Jeans!
Back in December 2020, I saw a paid of Derek Lam cargo style jeans on Net-a-porter that I loved the look of, but in my head they needed to be more deconstructed and tactile.
So, I set about creating the pattern for myself, and then using two pieces of denim remnants, two pairs of old, knackered jeans and some scraps to recreate the design as my own pair of DIY jeans!
It was a great way to spend time during my lockdown birthday week – and here’s how I went about creating them!
Choosing The Starting Block
For these DIY jeans, I choose the simple silhouette of Derek Lam’s ‘Elian’ cargo style pants.

Based on this silhouette, I grabbed my basic trouser block, traced it off and created a development pattern.
I marked in the sections on the front leg, and added in a little extra in the way of style-lines on the back legs to accommodate the smaller, scraper bits of denim in my fabric stash.
I decided to not have the belt, side pockets and back pockets, though I may still add these in!
If you don’t know how to make a pattern, you could use an existing pair of pants and trace them off to create a pattern.
Sections Needed
Because of the design, there were many pattern pieces that would need cutting out in denim:
- Front inner leg
- Front lower outer leg
- Front upper outer leg
- Front hip pocket
- Back upper leg
- Back knee
- Back inner leg
- Nack outer leg
- Trouser fly wrap
- Waistband
- Back patch pocket
Preparing The Denim
I started by using the biggest piece of denim I had for the upper back leg sections, so that I’d have a nice clean finish on the bum. This section required a dart on both sides, which I prepared and sewed.

I put aside the second biggest piece for the front right inner leg section that I planned to fray for some fab texture!
I was now down to using denim from previous deconstructed jeans and the few scraps left on my table.
I cut in half lengthways one of the denim legs I’d saved when making cut-off shorts from an old pair of GAP jeans, and, loving how the upper section had frayed over the last two years, I pinned these together to created a ‘natural’ slash – once stitched to secure, the two pieces were a great length for the longer front leg section!
Having hastily cut the front inner leg section out, it was with dismay that I realised I’d actually cut the same piece twice!
A lesson right there in not being lazy, and tracing off a mirror pattern piece if you plan to cut from different fabrics!
It worked out fine however, because the revers of the old denim jeans was a nice, paler ‘blue’ than the right side had been, so I went ahead and used it.
I decided that I would created the main hip pockets as patch pockets, and managed to wangle two from the same colour denim for consistency.
I cut the two front outer leg sections from my sister-in-law’s old maternity jeans. The denim was VERY dark, the darkest I had in fact, and I was very undecided about keeping it for the right side.
In the end, I reversed the pieced, and used the wrong side as the right side of the DIY jeans!
I now had only the back knee and back lower leg pieces left to cut, and succeeded by incorporating the original hem of the second cut off leg.
Something to note when working with a mix of denims – the older, previously worn denim that I cut from old pairs of jeans was a lot looser from being worn many times.
In comparison, the denim remnants that came from my stash were a lot tighter.
Stitching the two together meant there needed to be some controlling of the fabric to prevent the older denim stretching as I stitched.
Adding Fabric Manipulation Elements
I mentioned at the start how I had imagined these DIY jeans to have a lot of texture, and for me, that came down to using a selection of fabric manipulation techniques to create texture!
The Right Inner Front Leg
I had another smaller panel of the same denim which had a lovely frayed selvedge edge, so I stitched these together, and then sewed tucks – two either side – with the idea that I would cut through the tucks and hand fray them for a deconstructed and textured look.

After stitching the two frayed edges together, I sewed two tucks either side.

The next step was cutting through the tucks, and then pressing open and zigzag stitching them in place.

Then the fraying process – a seam ripper comes in handy to help carol the threads upwards!

This piece was shorter than I needed it to be for the front right left section, so I patched on two more remnants to get the length I needed.
The Left Inner Front Leg
This was the section where I had to use the wrong side as the right side.
I didn’t want to create anything too textured on this piece as the focus for me really was the hand fraying of the right inside leg section, so I opted instead to create more of a collage effect from denim scraps with ruffles for added texture.

Having pinned them in place, the next step was to zigzag stitch them down to secure them.

Next, I pinned in place the ruffle to make it more 3D, ready for hand-stitching.

Once the waist band was created, I ended up with a strip of patchwork denim which I turned into an additional ruffle element for this leg section!

The Left Hip Pocket
The left pocket I appliquéd on some denim remnants from the old jeans that were fraying beautifully, and used a zig zag stitch to limit the fraying further.

The Waistband
Having realised that I didn’t have enough width of any remnant to create a waistband, I had decided early on that I would patch together any denim scraps and to create something more deconstructed / reconstructed.

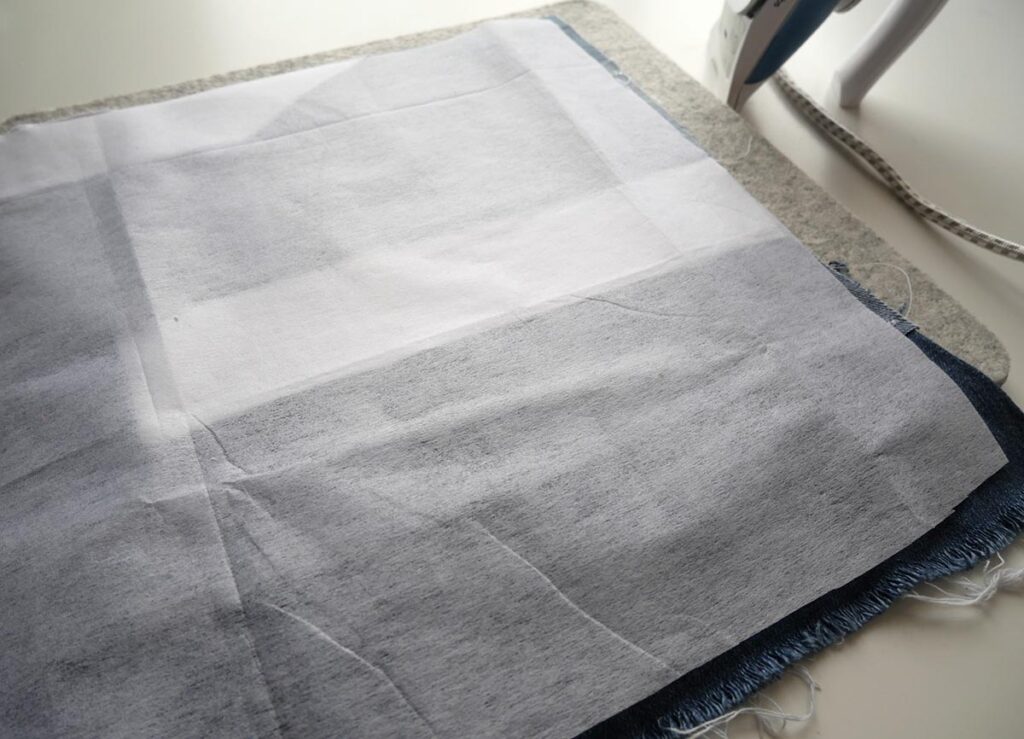
I incorporated the frayed edges of old jeans and made sure to stabilise with interfacing.

Finally, I cut the denim patchwork I had created into strips, which were then sewn together to create a long length that could be used for a waistband.


Sewing The DIY Jeans
The actual construction process of my DIY jeans was quite fast once I had prepped all the sections.
Step 1: Sewing The Back Legs
I started by sewing the back upper leg sections together – the back knee to the top back leg – with a zigzag stitch to enable further fraying when worn.

Next it was time to connect the lower back leg panels, incorporating the original hem.

The seam was again zigzag stitched afterwards to maintain consistency with the lapped sections previously sewn with the same stitch style.

The centre back was the next seam to be sewn, connecting both back legs together.

Step 2: Sewing The Front Legs
Below you’ll see the sections for the left leg. The upper right hand side is a patched together piece which will act as the pocket bag once I sew on top the hip pocket piece.

The hip pocket has now been stitched in place with zigzag stitch and frayed carefully afterwards.

Step 3: Sewing The Trouser Fly
Start by attaching the zipper to the underwrap using a zipper foot for your sewing machine is possible.

Next, sew the fly underwrap to the front leg.

Don’t forget to topstitch along the edge to secure the under-wrap in the correct position. You can see that I trimmed away the frayed section close to the centre front to prevent the frayed threads getting caught in the zipper.

Next pin and sew the CF seam up to the zipper end notch and finish sewing the second side of your trouser fly.

Step 4: Joining Front And Back Legs
Time to connect the front legs to the back. Sew the inseam and outer leg seam using the seam finish of your choice.
I chose to zigzag stitch from the waist to hem on the outer seam on both sides to maintain the stitch style consistency.

Step 5: Attaching The Waistband
I next pinned the patchwork waistband in place. It was much longer than anticipated, so I carefully aligned the very frayed edge with the opening, so that I could continue with the frayed, deconstructed style.

When happy with the positioning, I trimmed the excess patchwork denim away (to use for back pockets later) and sewed with a straight stitch to attach.


Fold and press the waistband forwards, and overlap so that the carefully create raw edge sits below the previously straight stitched line.

Finally, using the same zigzag stitch style, I closed the waistband.

Step 6: Hemming The DIY Jeans
Pin your hem in place if desired. I pinned mine in place but felt it was a little too neat and finished, and have since left the hems raw, though looking at the photo, I am pondering hemming with a double fold hem after all!

I actually went on to add elastic to the hems recently. Here’s how to sew elastic directly to fabric to create the fab new leg hem!
The Finished Jeans
I LOVE how these turned out. The finished jeans are very me, and will with time become more distressed and deconstructed because of the construction techniques used.

I particularly love the fringed panel, and the ruffles are also a firm favourite – I’m still hand stitching them in place to keep their 3D shape!
I also love how I managed to incorporate the button placket from a sleeve section left over from an up-cyling project over 2 years ago!

One thing I’m considering adding is back patch pockets and elasticating the hem to add a little shaping to the lower legs.
But, they look FAB worn with a nice white shirt.


Great article about your jeans – really enjoyed reading it, thank you. Would love to see a photo of you wearing them – or did I overlook it?
But…. Where is the picture of you wearing that new jeans? Or a pic of the end result?