Double Hem Sewing Tutorial
I think the double hem is the most widely used hem when sewing clothes. It’s easy to sew and encloses the raw fabric edge too, which is always a win-win in my eyes!
If you read – and followed – my single hem sewing tutorial, you’ll probably have figured out what the double hem entails.
In that tutorial we turned the fabric once to create a single fold, and then after pressing, stitched it in place.
The double fold hem is not much different!
How To Sew A Double Hem
The steps for this hem are almost identical to the single hem but require one extra fold of fabric.
1. Finish Raw Edges
This is an optional step really, as you will enclose the raw edge of fabric in the hem, but for those who like to have things neater than me, you should probably finish the fabric edge with an overlocker / serger or use a zig-zag stitch on your sewing machine.
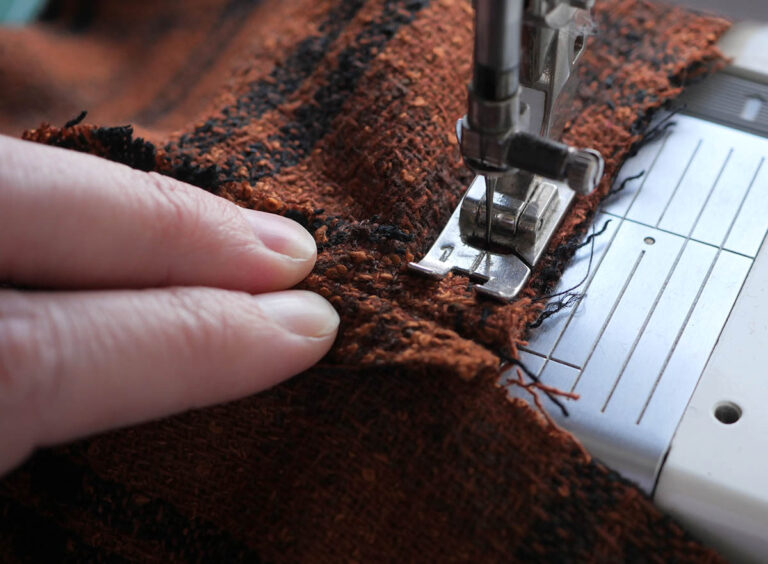
2. Use Your Seam Gauge
This is an essential step! Don’t just guesstimate how much hem allowance you need to turn over. I mean, you could, but you’ll inevitably end up with a wonky – and visible – stitch line.

Use your seam gauge to turn over ‘double’ the amount of hem allowance. I’m sewing with a 1 cm seam allowance along the hemline. I need my double-fold hem to be twice as much.
Usually I would measure 1 cm using the gauge, press, and then turn another 1 cm and press, enclosing the first amount inside the second turn. Then I would very carefully sew along that 1 cm stitch line.
In this tutorial I actually – rare occurrence! – used a 2.5 cm total hem allowance, and so turned 1.25 cm for both the first and second turning of the hem.
3. Pin The Double Hem Allowance

Some will say you don’t need to pin your hem allowance into place. And most of the time I don’t; I fold it as I sew. But for sewing beginners worried about their sewing machines going too ‘fast and furious’ I recommend pinning the double-fold hem allowance in place first before sewing.
The photos in this double hem sewing tutorial are from the double hem allowance on the York Pinafore Dress I sewed recently. That blog post review is coming in January!
4. Sewing The Double Fold Hem
Now that I’ve pinned the double hem into place, it’s time to sew it.

Even though my hem allowance totalled 2.5 cm, I still sewed with a 1 cm seam allowance – habit is hard to shift – which gave me a lovely 1 cm stitch line on the right side, but a clear 0.25 cm extension on the wrong side.
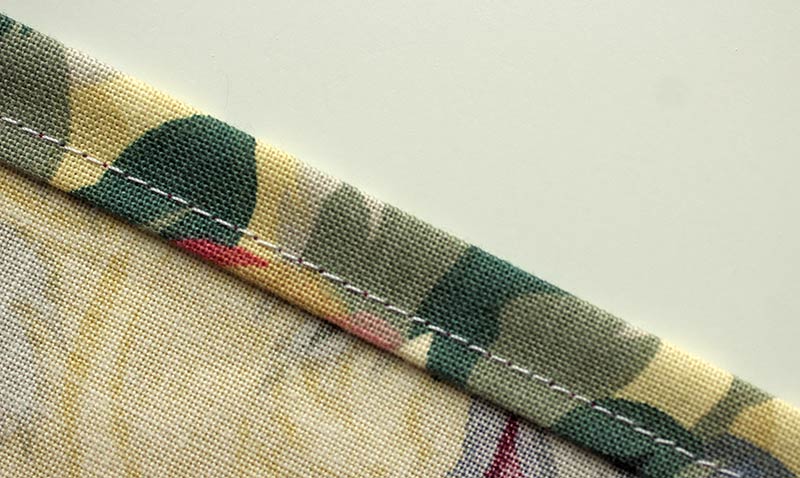
Alas, it will do!
5. Pressing The Double Fold Hem
The final job is to press the double hem that we just sewed. I still use my small travel iron, which did an okay job on the heavyweight curtain fabric that I used in this sewing tutorial.

I love the pinafore dress I created with during this tutorial – even though the fabric choice might be ‘odd’ to some people, I feel that it is a fabulous and fun version!